 English
iOS #
To integrate with iOS using Swift 4, a framework with its corresponding set of controls and classes is provided.
For additional information regarding how to reference the framework from your Xcode project, see the section Reference the framework.
Note: In case the connection to the server is not SSL with the HTTPS protocol, application permissions must be modified accordingly; see the section Connectivity permissions.
Initialization #
When the application is initialized, the static method load from the class Client should be invoked only one time as shown below:
import Prisma

@UIApplicationMain
class AppDelegate: UIResponder, UIApplicationDelegate {
    var window: UIWindow?

    func application(_ application: UIApplication, didFinishLaunchingWithOptions launchOptions: [UIApplicationLaunchOptionsKey: Any]?) -> Bool {
        Client.load(server: "localhost", port: "8080", appToken: "22dae0ad-a6a8-4767-80bc-b29098147813", customer: "1234")

        return true
    }
It is recommended to perform this initialization when the application finishes loading, in the AppDelegate class.
The Client class is a singleton, so any time it is referenced you will get the same instance of the object, which should be accessed using the static attribute shared.
Client.shared!
The initialization parameters for Prisma client library are the following:
load(server: String, port: String, appToken: String, customer: String, proto: String)

:param String server: Server address where Prisma server is running.
:param String port: Access port for the Prisma service.
:param String appToken: Access token for the integrated application.
:param String customer: Identified customer if available, otherwise pass "".
:param String proto: Connection protocol to use, default is "https"
Embedded banners #
To integrate a banner into an iOS View, there is a control named Placeholder which will be used to dinamically load content. The following steps should be followed:
Add a
Horizontal Stack Viewcontrol to the View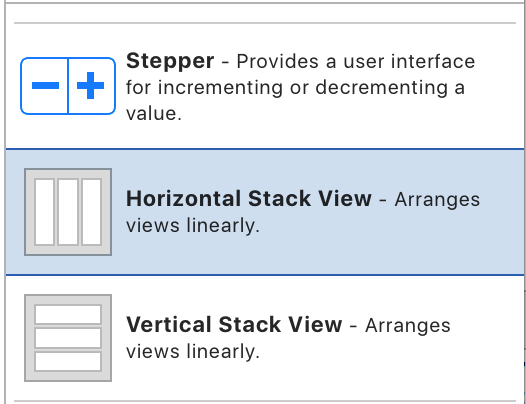
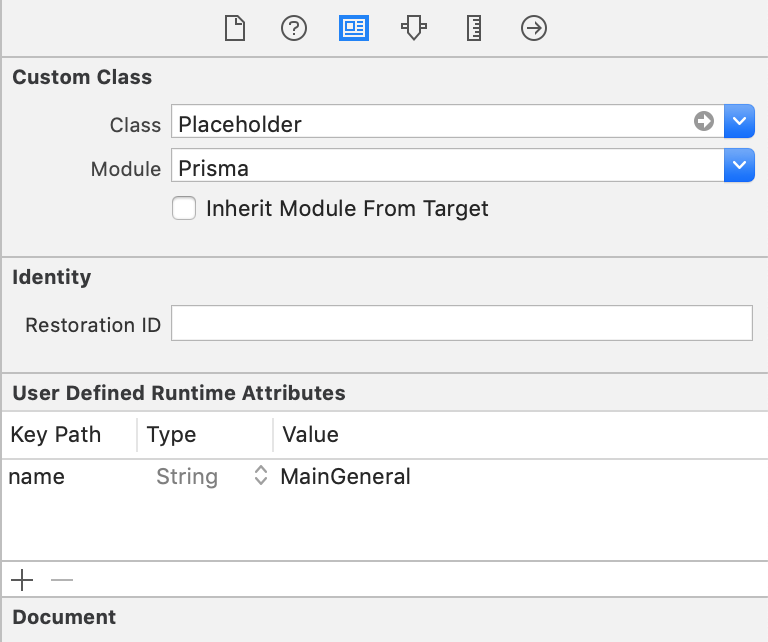
Link this control to the class
Placeholderfrom thePrismaframework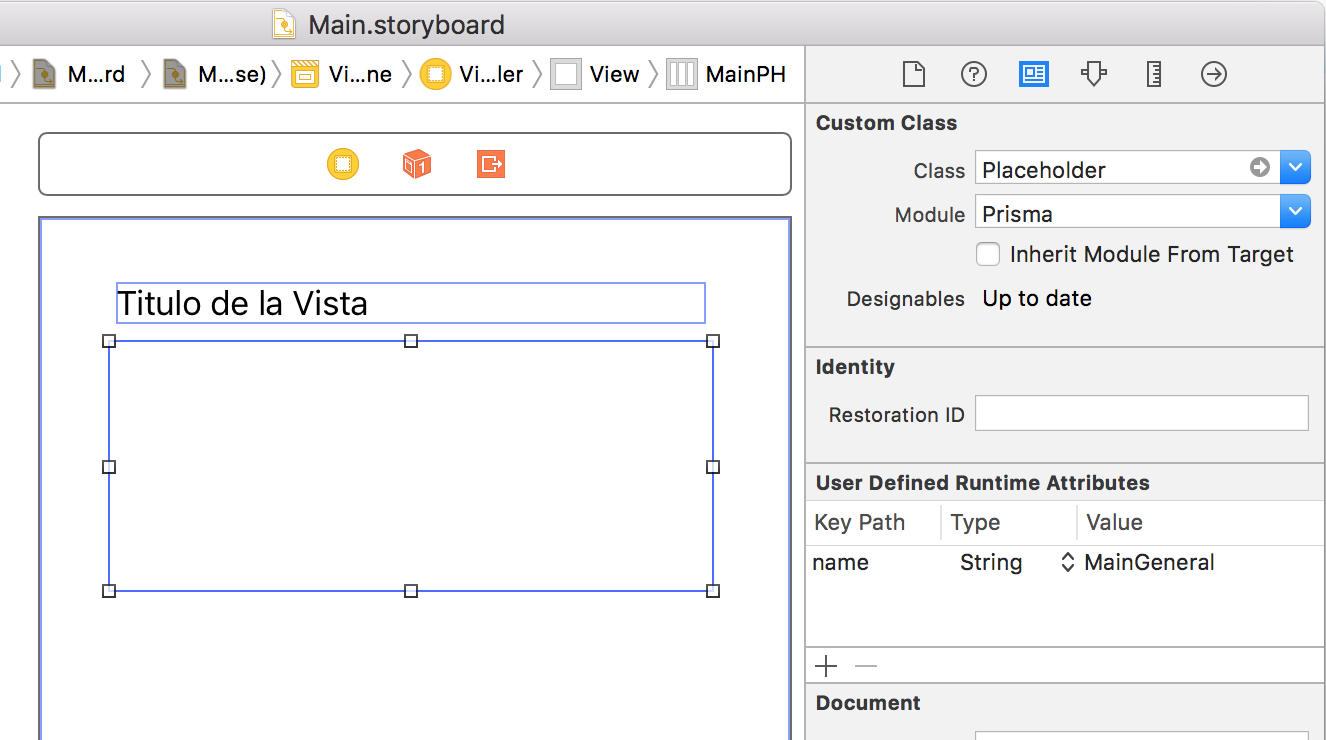
Define placeholder’s name according to campaing manager configuration.
Define an
Outletfor controlPlaceholder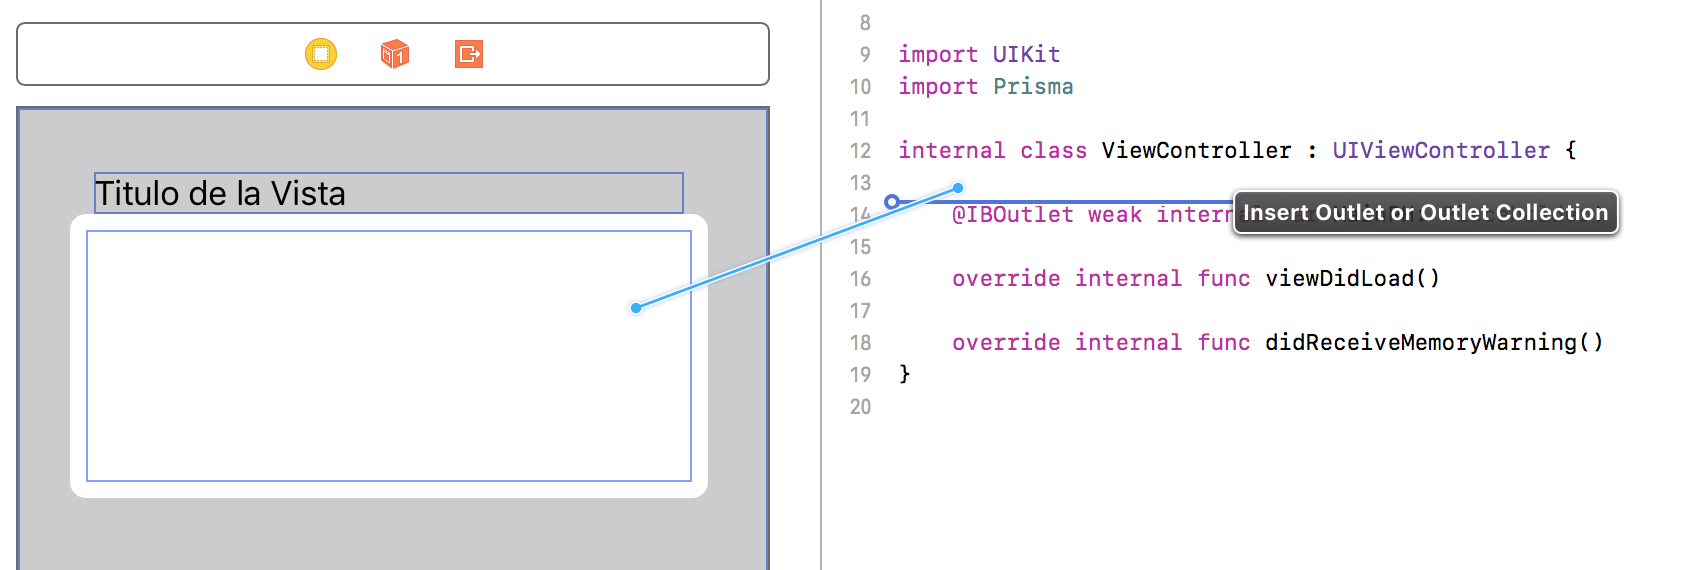
We should name this variable in order to be able to reference the placeholder during page synchronization.
Force campaigns synchronization when the View is created.
import Prisma

class ViewController: UIViewController {

    @IBOutlet weak var MainPH: Placeholder!

    override func viewDidLoad() {
        super.viewDidLoad()

        Client.shared!.syncView(viewName: "Main", placeholders: [MainPH])
    }
In this case the parameter placeholders passes the list of placeholders defined as outlets, and the parameter viewName passes the current view name. MainPH is the name we assigned to the Outlet in the previous step.
Customized banners #
In case you would like to create banners from your own application code without using the embedded controls provided by our SDK, this is possible by using the parameter onSynced from method syncView.
In such a context, when the banners for the synchronized activity are retrieved, the onSynced callback will be called:
Client.shared!.syncView(viewName: "ViewControllerName", placeholders: [MainPH], onSynced: {(result: Dictionary<String, PlaceholderContent>) -> Void in
    if result["MainGeneral"] != nil {
        let content:PlaceholderContent = result["MainGeneral"]!
        let size = content.banners.count
        print("Total banners \(size) found for placeholder")
    }
})
To retrieve banner views based on placeholder’s content:
let banner = content.banners[0]
let v:UIView = banner.getView()
To obtain the content of an HTML banner:
let htmlBanner = banner as! HtmlBannerView
let htmlContent:String = htmlBanner.getHTMLContent()
To invoke funnel initialization from an existing banner:
let funnel = banner.getFunnel()
funnel.show()
To dismiss a campaign from an existing banner:
let funnel = banner.getFunnel()
funnel.dismiss()
dismiss and redirect protocols
#
Prisma exposes extensibility points through protocols:
PrismaRedirectHandler.onRedirectis called when a redirect step of a funnel is executed.- It might be used, for example, to browse the URL using
SFSafariViewController(in order to keep the user in the app) and returntrueto signal Prisma that it should not execute its default action (browse the URL in Safari).
- It might be used, for example, to browse the URL using
PrismaDismissHandler.onDismissedis called when the user dismisses a campaign from a banner.- Return true to signal Prisma that it should not sync the view.
import Prisma

@UIApplicationMain
class AppDelegate: UIResponder, UIApplicationDelegate, PrismaRedirectHandler, PrismaDismissHandler {
    var window: UIWindow?

    func application(_ application: UIApplication, didFinishLaunchingWithOptions launchOptions: [UIApplicationLaunchOptionsKey: Any]?) -> Bool {
        Client.load(server: "localhost", port: "8080", appToken: "22dae0ad-a6a8-4767-80bc-b29098147813", customer: "1234", redirectHandler: self, dismissHandler: self)

        return true
    }

    func onRedirect(url: URL) -> Bool {
        return true;
    }

    func onDismissed() -> Bool {
        return true;
    }
}
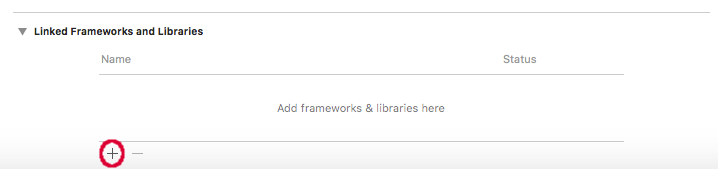
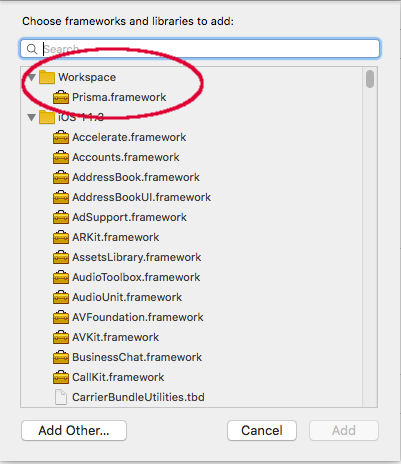
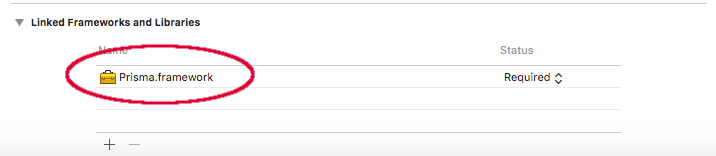
Reference the framework #
Manual integration #
To reference the Prisma framework, copy Prisma.framework into your project’s folder, and then add reference as follows:
Integration via CocoaPods #
Add the ‘Prisma’ pod to your Podfile as shown in the following example (optionally, add Jumio):
# Prisma requires iOS 9.0; Jumio requires iOS 10.0
platform :ios, '9.0'

target 'MyProject' do
  pod 'Prisma', :podspec => 'https://s3.sa-east-1.amazonaws.com/prisma.sdk/Prisma_Swift5_1.2.2.podspec'
  # pod 'JumioMobileSDK/Netverify', '2.14.0'
end
Install the pod to your project with pod install.
Connectivity permissions #
In case the plataform your are connecting to does not have SSL certificates, add an exception section to the Info.plist file of your project to explicitly allow insecure connections.
Edit the file and replace your-server-address with the IP address or server name of the Campaigns server to use.
<key>NSAppTransportSecurity</key>
<dict>
  <key>NSAllowsArbitraryLoads</key>
  <true/>
  <key>NSExceptionDomains</key>
  <dict>
    <key>your-server-address</key>
    <dict>
      <key>NSExceptionAllowsInsecureHTTPLoads</key>
      <true/>
      <key>NSIncludesSubdomains</key>
      <true/>
    </dict>
  </dict>
</dict>