 English
Settings #
Under SETTINGS you will find several submenus to configure the operation of Prisma Campaigns as explained next.
Company Preferences #
This section allows you to configure the following:
1. A default timezone for all operations performed through Prisma Campaigns. To do this, select a timezone from the dropdown list:
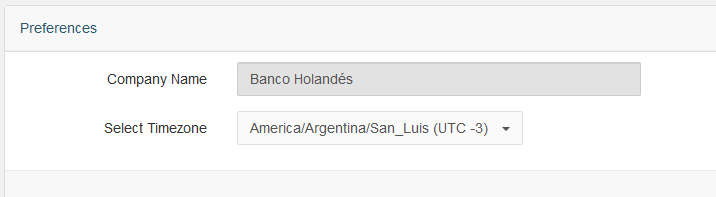
It is important to note that it is possible to set a different timezone for each campaign in particular. This can be handy if the target customers reside in another country, for example.
2. Endpoint URLs:
- A public endpoint (website) for your customers
- A secure endpoint for Prisma admin users
- A URL shortener to create brief links, more suited for SMS messages
Any changes made in this section take effect immediately. For this reason, make sure that you enter the correct values to avoid impacting the operation of Prisma Campaigns negatively.
The configuration for the three endpoints listed above consists of a protocol (http or https), a domain, and a TCP port.
Click Save to apply any changes made to this section.
Language and Client Messages #
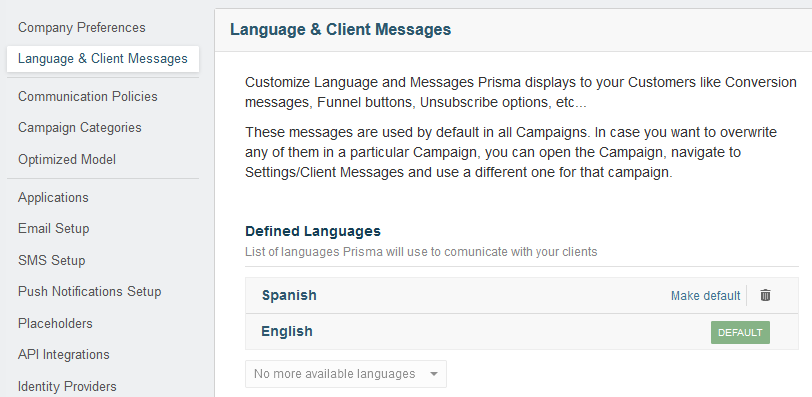
Prisma Campaigns provides predefined messages that are customizable in two languages (English and Spanish). These messages apply to a wide variety of scenarios (conversion information, funnel buttons, campaign unsubscribe options, etc.) with English initially being the default tongue. You can change the current selection by clicking on Make default next to the available language:
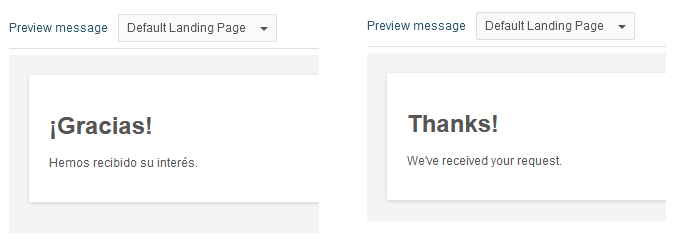
For each predefined message (conversion, buttons in the funnel, options to unsubscribe from a campaign, etc.), you can enter the corresponding text in the available languages. Thus, customers will see the communication in the language that you chose in the configuration. For example, the following image illustrates the same message for the default landing page in English and Spanish:
It is worth noting that the messages in Language & Client Messages apply to all campaigns. If you wish to use others specific to a given campaign, you can do so from the campaign configuration as explained in the Campaigns section of this manual.
Communication Policies #
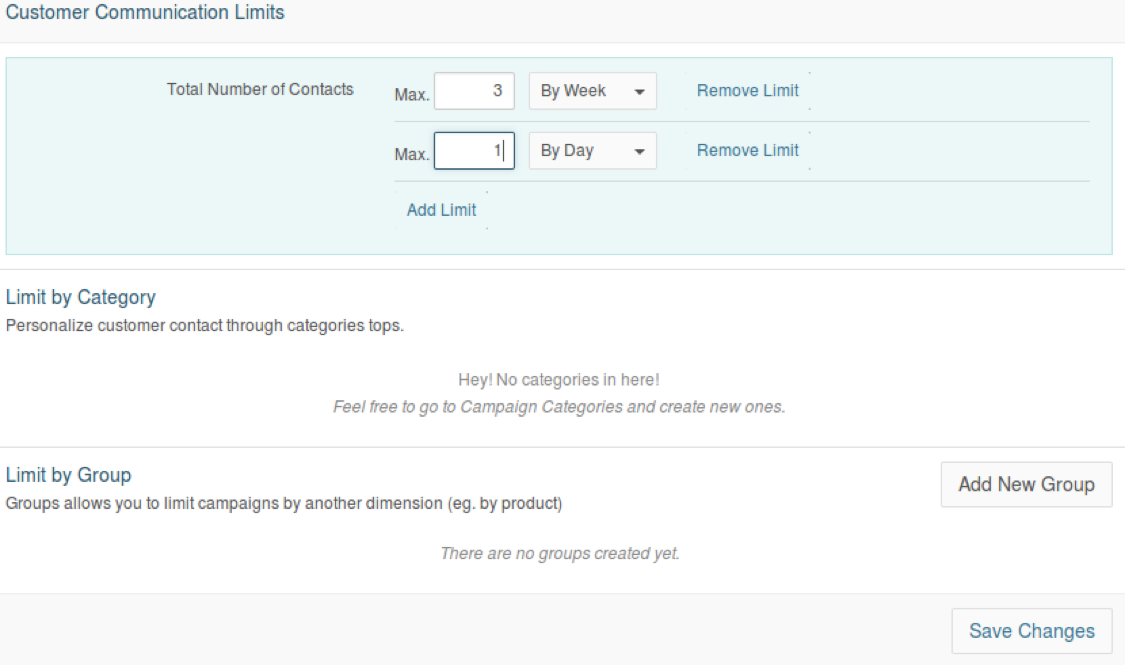
Communication policies allow to set (or disable) a limit to the number of contacts to be made with one customer over a given time window (by day, by week, by month, or during consecutive days). This variable comes into play as we consider that the same person can be the recipient of different campaigns depending on the segments being used. It is important to choose a sensitive contact policy to avoid contacting your customers too frequently, thus causing an unwanted effect.
Besides setting communication policies by a period, you can also set limits by groups or categories previously created. Even when you indicate a maximum number of contacts over a period you can still add additional limits to refine the used criteria. For example, the following image shows that the maximum number of contacts by week is 3, but the second criterion limits that amount to once per day at most.
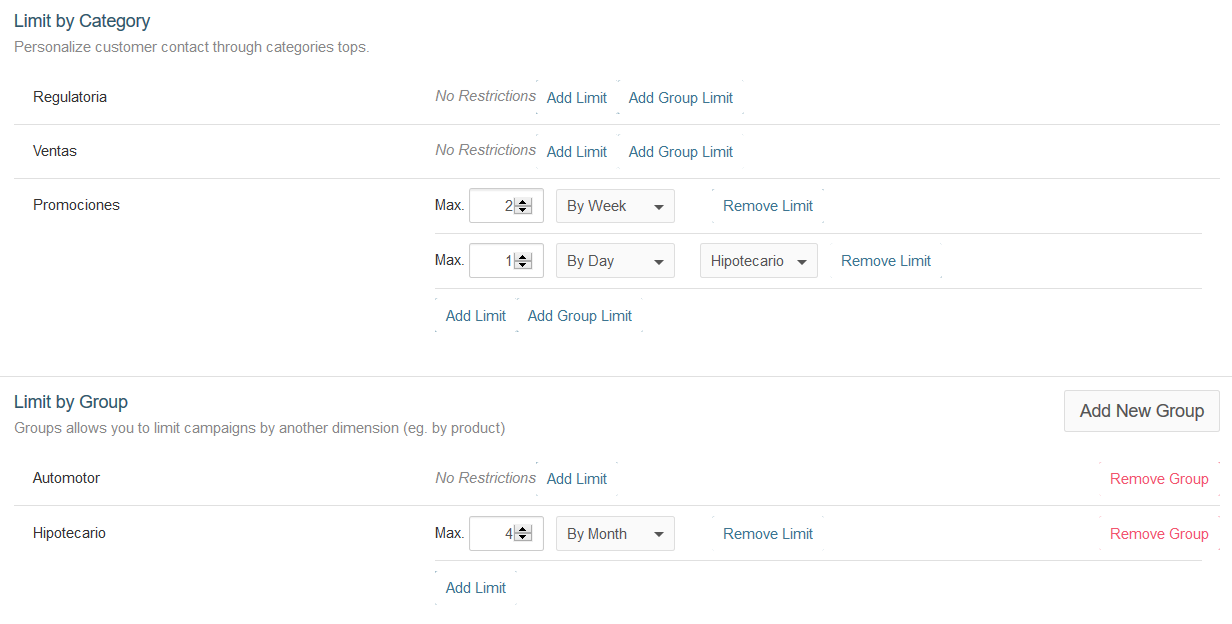
On the other hand, let us consider an instance of a communication policy that includes a category, a group, and a combination of both as illustrated below. This particular policy indicates the following:
Do not contact customers about promotions (Promociones category) more than twice a week.
Do not contact customers about mortgages (Hipotecario group) more than four times a month.
Do not contact customers about mortgage offers more than once a day (a combination of the group called Hipotecario and the Promociones category).
To add group-based limits in a given category, click Add Group Limit inside the category in question. It is important to clarify that at this point you can create new groups to organize campaigns using a product as criteria later.
If a client qualifies for a campaign that uses both the group and category shown in the image, the most “restrictive” contact policy will be applied. In this case, the client will be contacted four times a month at most.
It is important to note that the limits given by the communication policies apply to banner popups (excluding single and multiple campaign placeholders), emails, SMS, push notifications, and automatic popups.
Regardless of the case or criteria chosen, the changes saved will take effect after configuring the campaign distribution. For more details, refer to the corresponding section in this manual.
Prioritization of Campaigns with Communication Policies #
When there are policies defined to limit the contacts with a customer, Prisma Campaigns checks if there are campaigns with higher priority in the future for each person on the distribution list. If there is a campaign with higher priority, determined by its category, it is dispatched instead of the first one.
If the system chooses not to send the campaign to comply with the communication policy limits, this detail is saved in the campaign and can be viewed in the data export:

Categories #
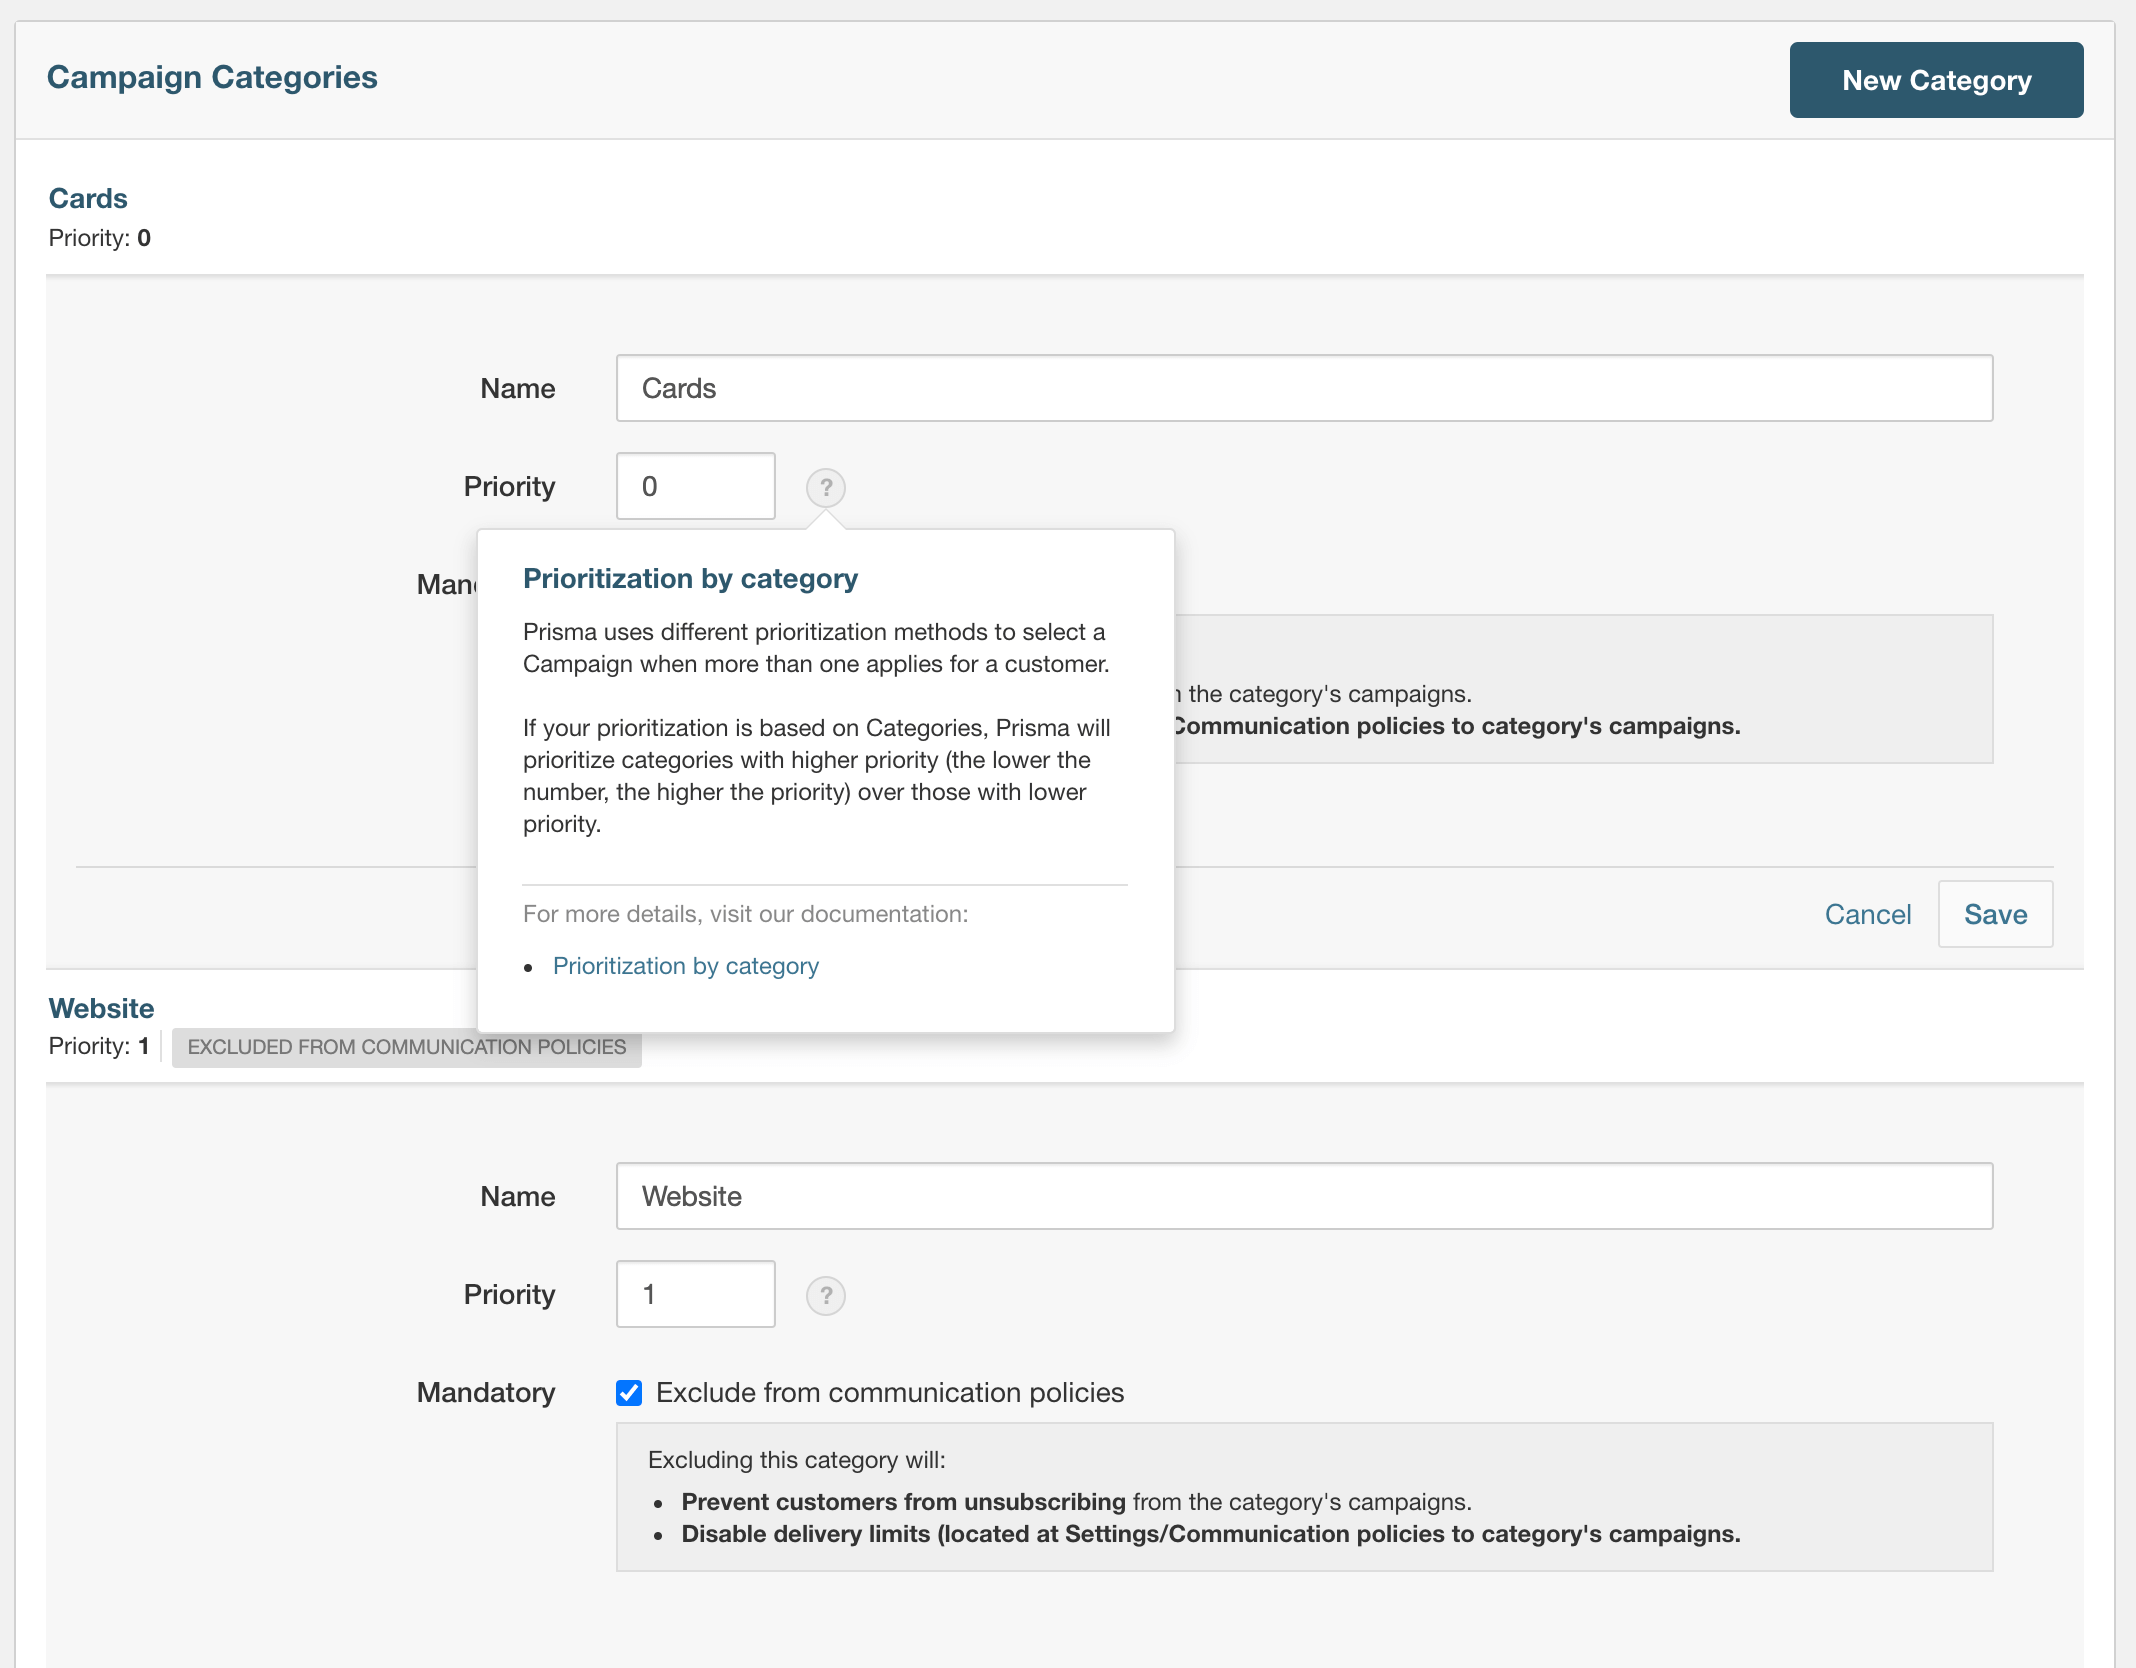
Campaign categories determine the campaign type (sales, promotions, informative, and so forth) and allow to create, assign priorities, and potentially exclude new or existing categories from contact policies. When the campaign is configured later, both the category and the group can be used to define the priority using an integer number (the lesser the number, the higher the priority). In this regard, it is important to keep in mind that if you need several categories with different priorities, it is necessary to leave a gap in the scale (for example, skipping numbers 5 through 10). On the other hand, the group is often given by the offered products (such as car loans, mortgages, and savings accounts to name a few examples).
For instance, the image below shows two categories named Ventas and Generales with different priorities (5 and 10, respectively). If a given customer qualifies for campaigns using both, Prisma Campaigns will prioritize the former.
Optimized Model #
There are different application sections where you can use the optimized selection model. Selecting the most appropriate campaigns for a customer at a given time, and picking effective images for banners with greater conversion probability of conversion are two examples. The use of an optimized model, through algorithms and statistical techniques, ensures that each client will receive the best possible offer at any given time.
Campaign solutions leverage Machine Learning (ML) and automatic learning to build a probabilistic model with the best offers or messages for each customer.
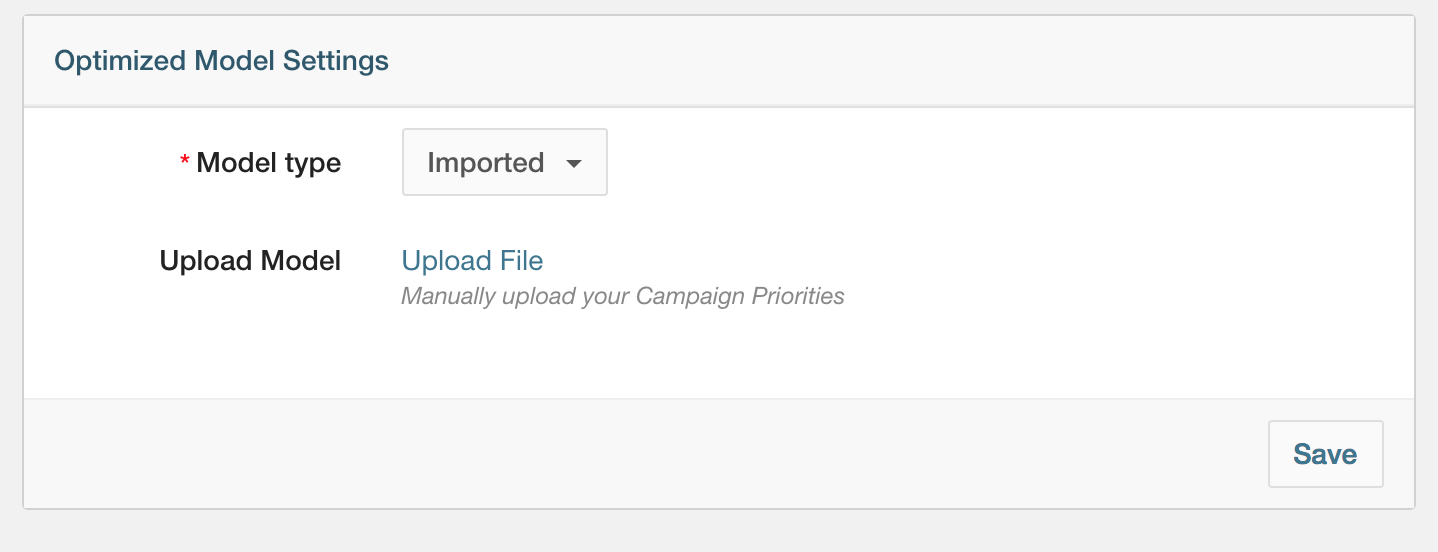
In the basic settings section, you can define if you want to use this internal model or import a learning/prioritization model. To do this, choose Built-In or Imported, respectively.
Model Import #
To import an external optimized model, you need to select a .csv file after clicking Upload File. Using this method you can specify the priority for a campaign, category, product (or combination) for each customer.
To define the model, the following fields are required:
- customer represents the customer identifier for which the priority is set.
- campaign is the name of the campaign.
- category indicates the category for which the priority is set.
- group is the name of the group.
- priority is a numeric value (minimum is zero) that specifies the priority. The higher the value, the higher the priority.
The fields campaign, category, and group are optional, but at least one of them must be present so that the priority line is valid.
To illustrate, let us consider the file below:
customer,campaign,category,group,priority
1271921,"Prestamos Personales",,,10
3919123,,Ventas,,7
0911224,,,Automotor,5
3919123,,CRM,Hipotecario,3
In this example, client 3919123 has a priority of 7 for campaigns of category Ventas and a priority of 3 for campaigns of category CRM for products in group Hipotecario. As a result, if these two campaigns coincide in time, the former will be prioritized over the latter.
To update the model at a later time, you can upload other files with the same structure. It is worth noting that priority is the most important column and will be used to determine if each line must be added as a new record or if an existing one needs to be updated. For instance, if our optimized model is described by the above file let us examine what would happen if upload the following:
1271921,"Prestamos Personales",,,8
3919123,,Ventas,,7
0911224,"Prestamos Personales",,Automotor,6
For client
1271921, the priority for the campaign Préstamos Personales (with any category or group) would change from 10 (old) to 8 (new). In this case, the import will update an existing record with a new priority.The priority for the campaign Ventas will not change for customer
3919123.Although client
0911224already had a priority set for the category Automotor, a new record will be added with a higher priority for the campaign Préstamos Personales in particular.
At this point, the current model is as though we had imported a file with the corresponding records in the first place:
customer,campaign,category,group,priority
1271921,"Prestamos Personales",,,8
3919123,,Ventas,,7
0911224,,,Automotor,5
3919123,,CRM,Hipotecario,3
0911224,"Prestamos Personales",,Automotor,6
It is important to clarify that you can download a report that contains the lines that were rejected during each import (if any). To do so, click Download rejected rows:

As you can see in the above image, it is also possible to remove the model by clicking Delete Model. This action must be considered with care because it is irreversible, and is only recommended if you have made the conscious decision to start a new model from scratch.
Applications #
In this section, you can set up an external application to interact with Prisma Campaigns from multiple platforms. Additionally, it is possible to create and associate a Business Event to each application and use it to trigger a campaign funnel as described in the Campaigns chapter.
Javascript #
Below you will see the Javascript code that will allow you to integrate the tool with external channels and/or applications. Among other examples, this may include their public website, their home banking application, or a promotions site if available.
The actual integration to a web environment is made through a Javascript library. To use it, you need to embed the following code inside the body of the page (between the <body> and </body> tags) where you wish to display the application:
<script type='text/javascript'src='http://SERVER:PORT/sdk/javascript/prisma.js'></script>
<script type="text/javascript">
    prisma.load(SERVER,PORT,APP_TOKEN,CUSTOMER_ID,integrations,protocol,options);
</script>
In the above snippet, APP_TOKEN represents an application token that Prisma Campaigns automatically generates. In addition, the following parameters are required:
- The server URL (SERVER) where the application is installed,
- the port (PORT),
- the client identifier (CUSTOMER_ID, if available in the current user session) and
- a vector called integrations containing the placeholder identifier to be used and that of the HTML element (usually a div) where it will be displayed on the page.
The integration is completed by copying the snippet with the correct parameters within the corresponding HTML page.
Email Configuration #
Through Email Setup you can create and configure the email addresses that will be used to send the campaign messages (outbound email only). When you add a new email address, you need to choose one delivery channel option from the available options:
A Mailgun account, an online email management service for applications.
Sendgrid, a scalable, cloud-based email delivery service that allows you to send messages through an API.
An existing SMTP server, or
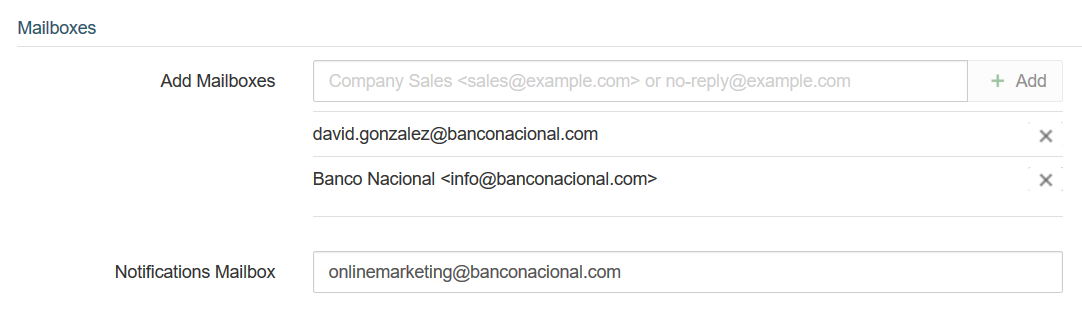
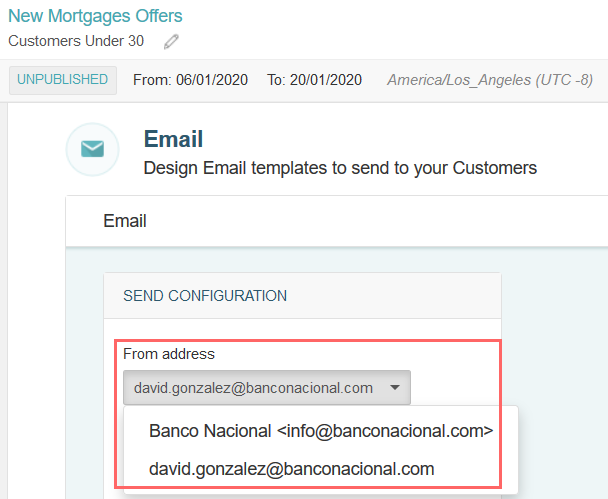
For the latter, you can add as many source mailboxes as needed and another for notifications. Thus, you will be able to use different ones for separate campaigns. The image below shows two source mailboxes (david.gonzalez@banconacional.com and info@banconacional.com) and onlinemarketing@banconacional.com as the notifications mailbox.
Finally, go to a campaign that uses email and choose one of the source mailboxes as the From address:
To use Mailgun properly, be sure to add and verify a domain or subdomain in your Mailgun dashboard to obtain your API key before attempting to send out messages.
As always, don’t forget to save and publish the changes for them to take effect.
SMS Configuration #
In SMS Setup you can set up the delivery channel(s) for campaign broadcasting through SMS (text) messages. The available alternatives are the following:
- Amazon SNS (Simple Notification Service), a fully managed service designed to facilitate interactions between distributed systems through SMS.
- Infobip, a comprehensive suite of global carrier services, enabling seamless text-based exchanges across various regions.
- Eltropy, which specializes in solutions tailored for financial institutions.
- Twilio, a cloud communications platform that includes SMS capabilities and also sells phone numbers.
- Glia, a digital customer service platform that integrates SMS as a core feature.
To use any of the above options, it is necessary to configure an origin number through Add Origin Numbers within Prisma Campaigns as seen below. The other fields shown in the image are employed to authenticate the sender.
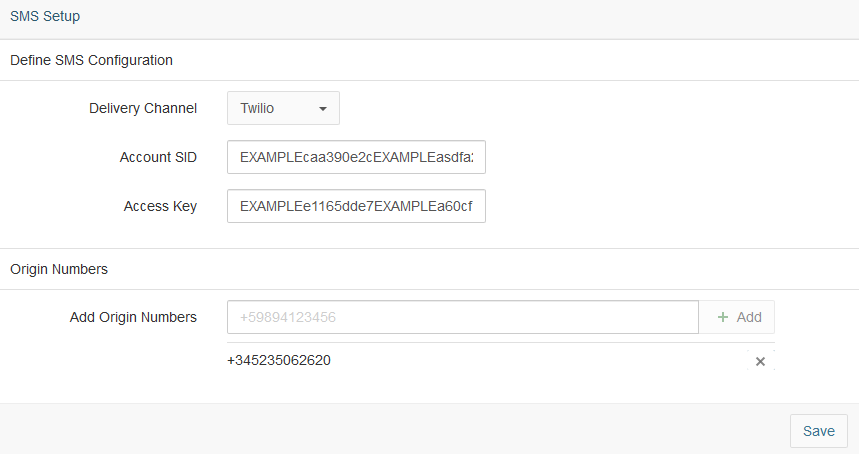
The chosen origin number must follow the E.164 format, which consists of a plus sign (+) followed by the country code and the number itself as provided by the phone service provider.
After saving the changes, you can start using the channel to carry out test communications and configure the funnel of any campaign.
Push Notifications Setup #
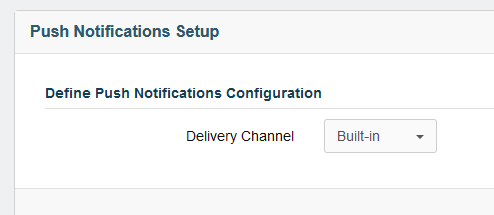
In this section, you can configure push notifications in a mobile application to launch when your customers tap on them. The prerequisites are the following:
Define the delivery channel as Built-in in Prisma Campaigns:
Generate the required certificates in Firebase or Apple to ensure a secure connection between the customer’s device and the application.
Once the certificates are available, the process to put them in place with Prisma Campaigns is very simple. To begin, go to Settings/Applications, type the application name, and choose the desired platforms:
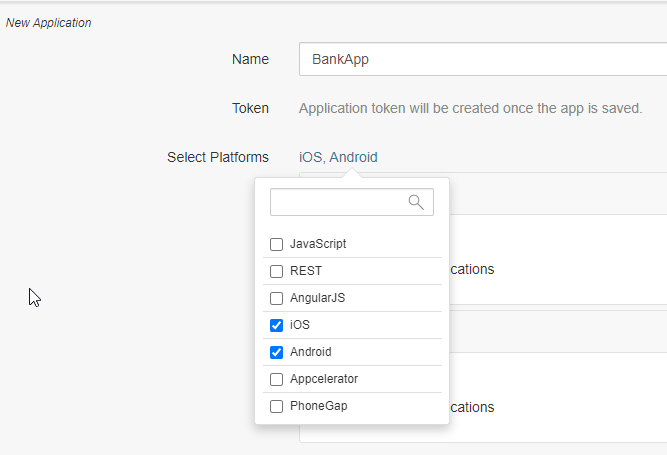
Next, enable the notifications for the platform(s) you chose and enter the security information, which consists of a certificate and its associated password for iOS, and the token for Android:
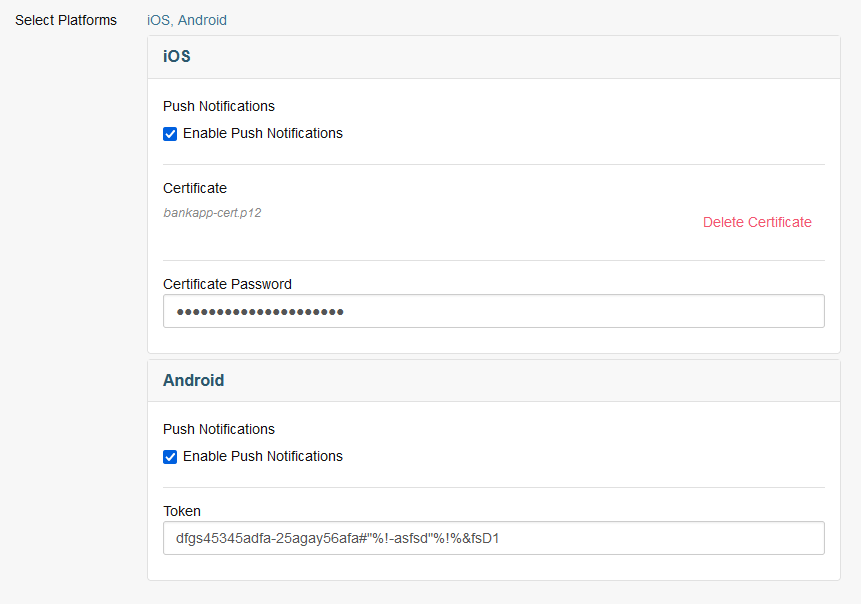
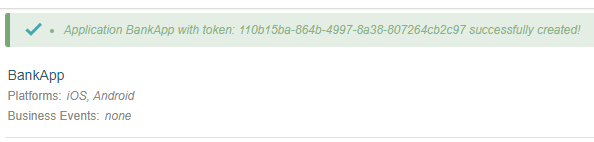
Saving the changes will also generate an internal token for Prisma Campaigns to identify the application in question:
For more information, please refer to Push Notifications in the campaign configuration.
Direct Mail Setup #
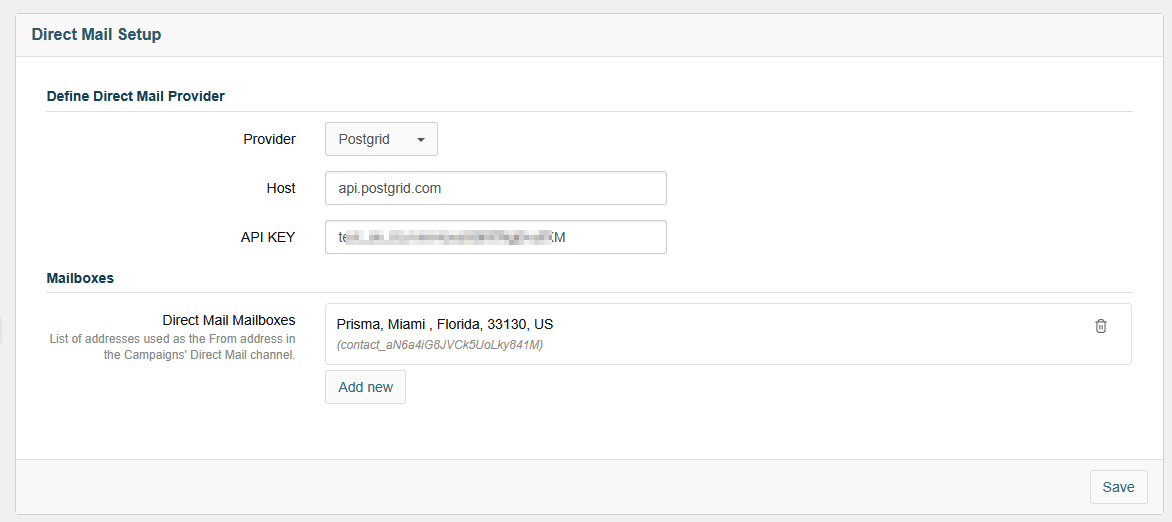
To configure direct mail, go to Settings/Direct Mail Setup. Select PostGrid as your provider, then input api.postgrid.com as the host along with your PostGrid API key. Next, add one or more return addresses that will be available when configuring a campaign. However, Prisma Campaigns does not validate the return addresses so make sure they are correct before proceeding.
Placeholders #
Placeholders are dedicated spaces that are used to display information about one or more campaigns (with a transition between one and the next) through banners and images on a web page. Besides the name chosen for each placeholder, they are defined by the destination platform (Web, Facebook, or Mobile), their dimensions in pixels, and the position within the screen. For example, the image below shows a placeholder meant for web broadcasting called BusinessSlider of 900 x 200 pixels with a predetermined position in the upper section of the screen. In addition, we can see that it allows to display up to three different banners (from up to 3 different campaigns) with a transition time of 3000 milliseconds (3 seconds) each.
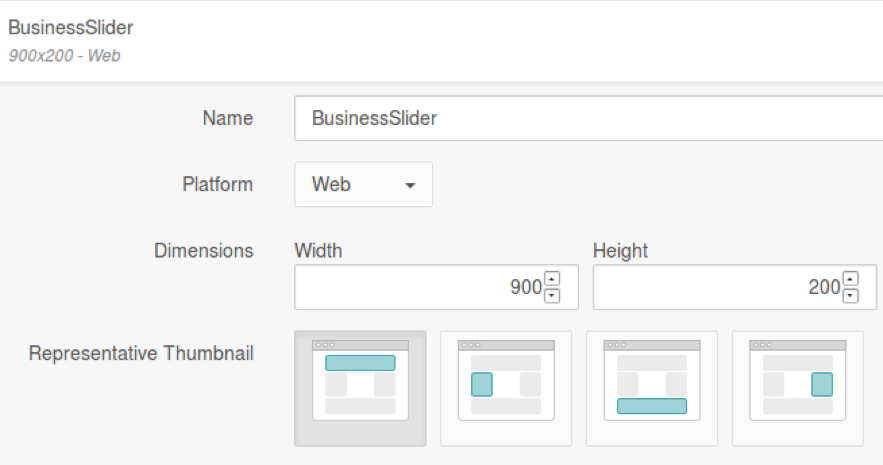
All the details mentioned previously are set up when the placeholders are created.
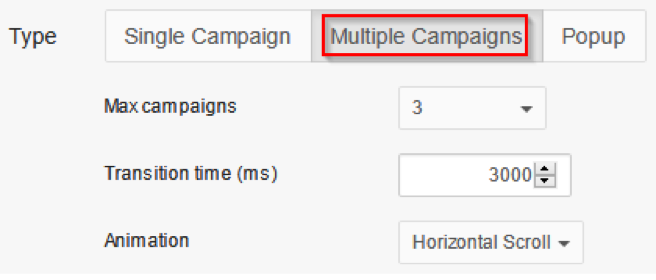
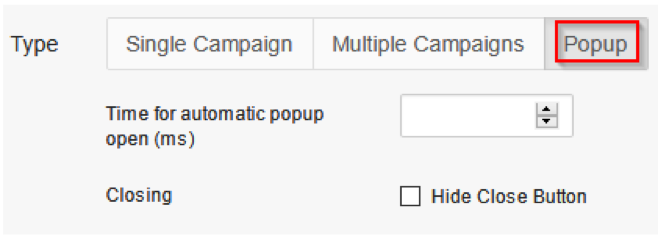
The three types of placeholders available (Single Campaign, Multiple Campaigns, and Popup) and their configuration options can be observed in the Placeholders section inside SETTINGS. Please refer to the following images and bullet points for more details.
- Single Campaign can hold only one banner related to a given campaign. Unlike the other alternatives detailed below, it does not have any configuration options. While only one campaign can be shown at a time, many campaigns may compete to appear on the placeholder. If so, Prisma Campaigns will use its built-in smart features to automatically select which campaign should be displayed to each client.

- Multiple Campaigns admits two or more banners for multiple campaigns up to the number set in Max campaigns. In this case, we can configure the transition time between two different banners and the animation that leads from one to the next.
- Banners linked to Popup placeholders will open as a pop-up window after a specified time has passed (given by Time for automatic popup open). The default value is 0 ms, causing the window to open immediately when the page is loaded. If enabled, the Hide Close Button will hide the popup window’s close button, allowing the user to implement it in the banner’s HTML code directly.
For more details on the use of placeholders, refer to the Banners section in the Campaigns chapter.
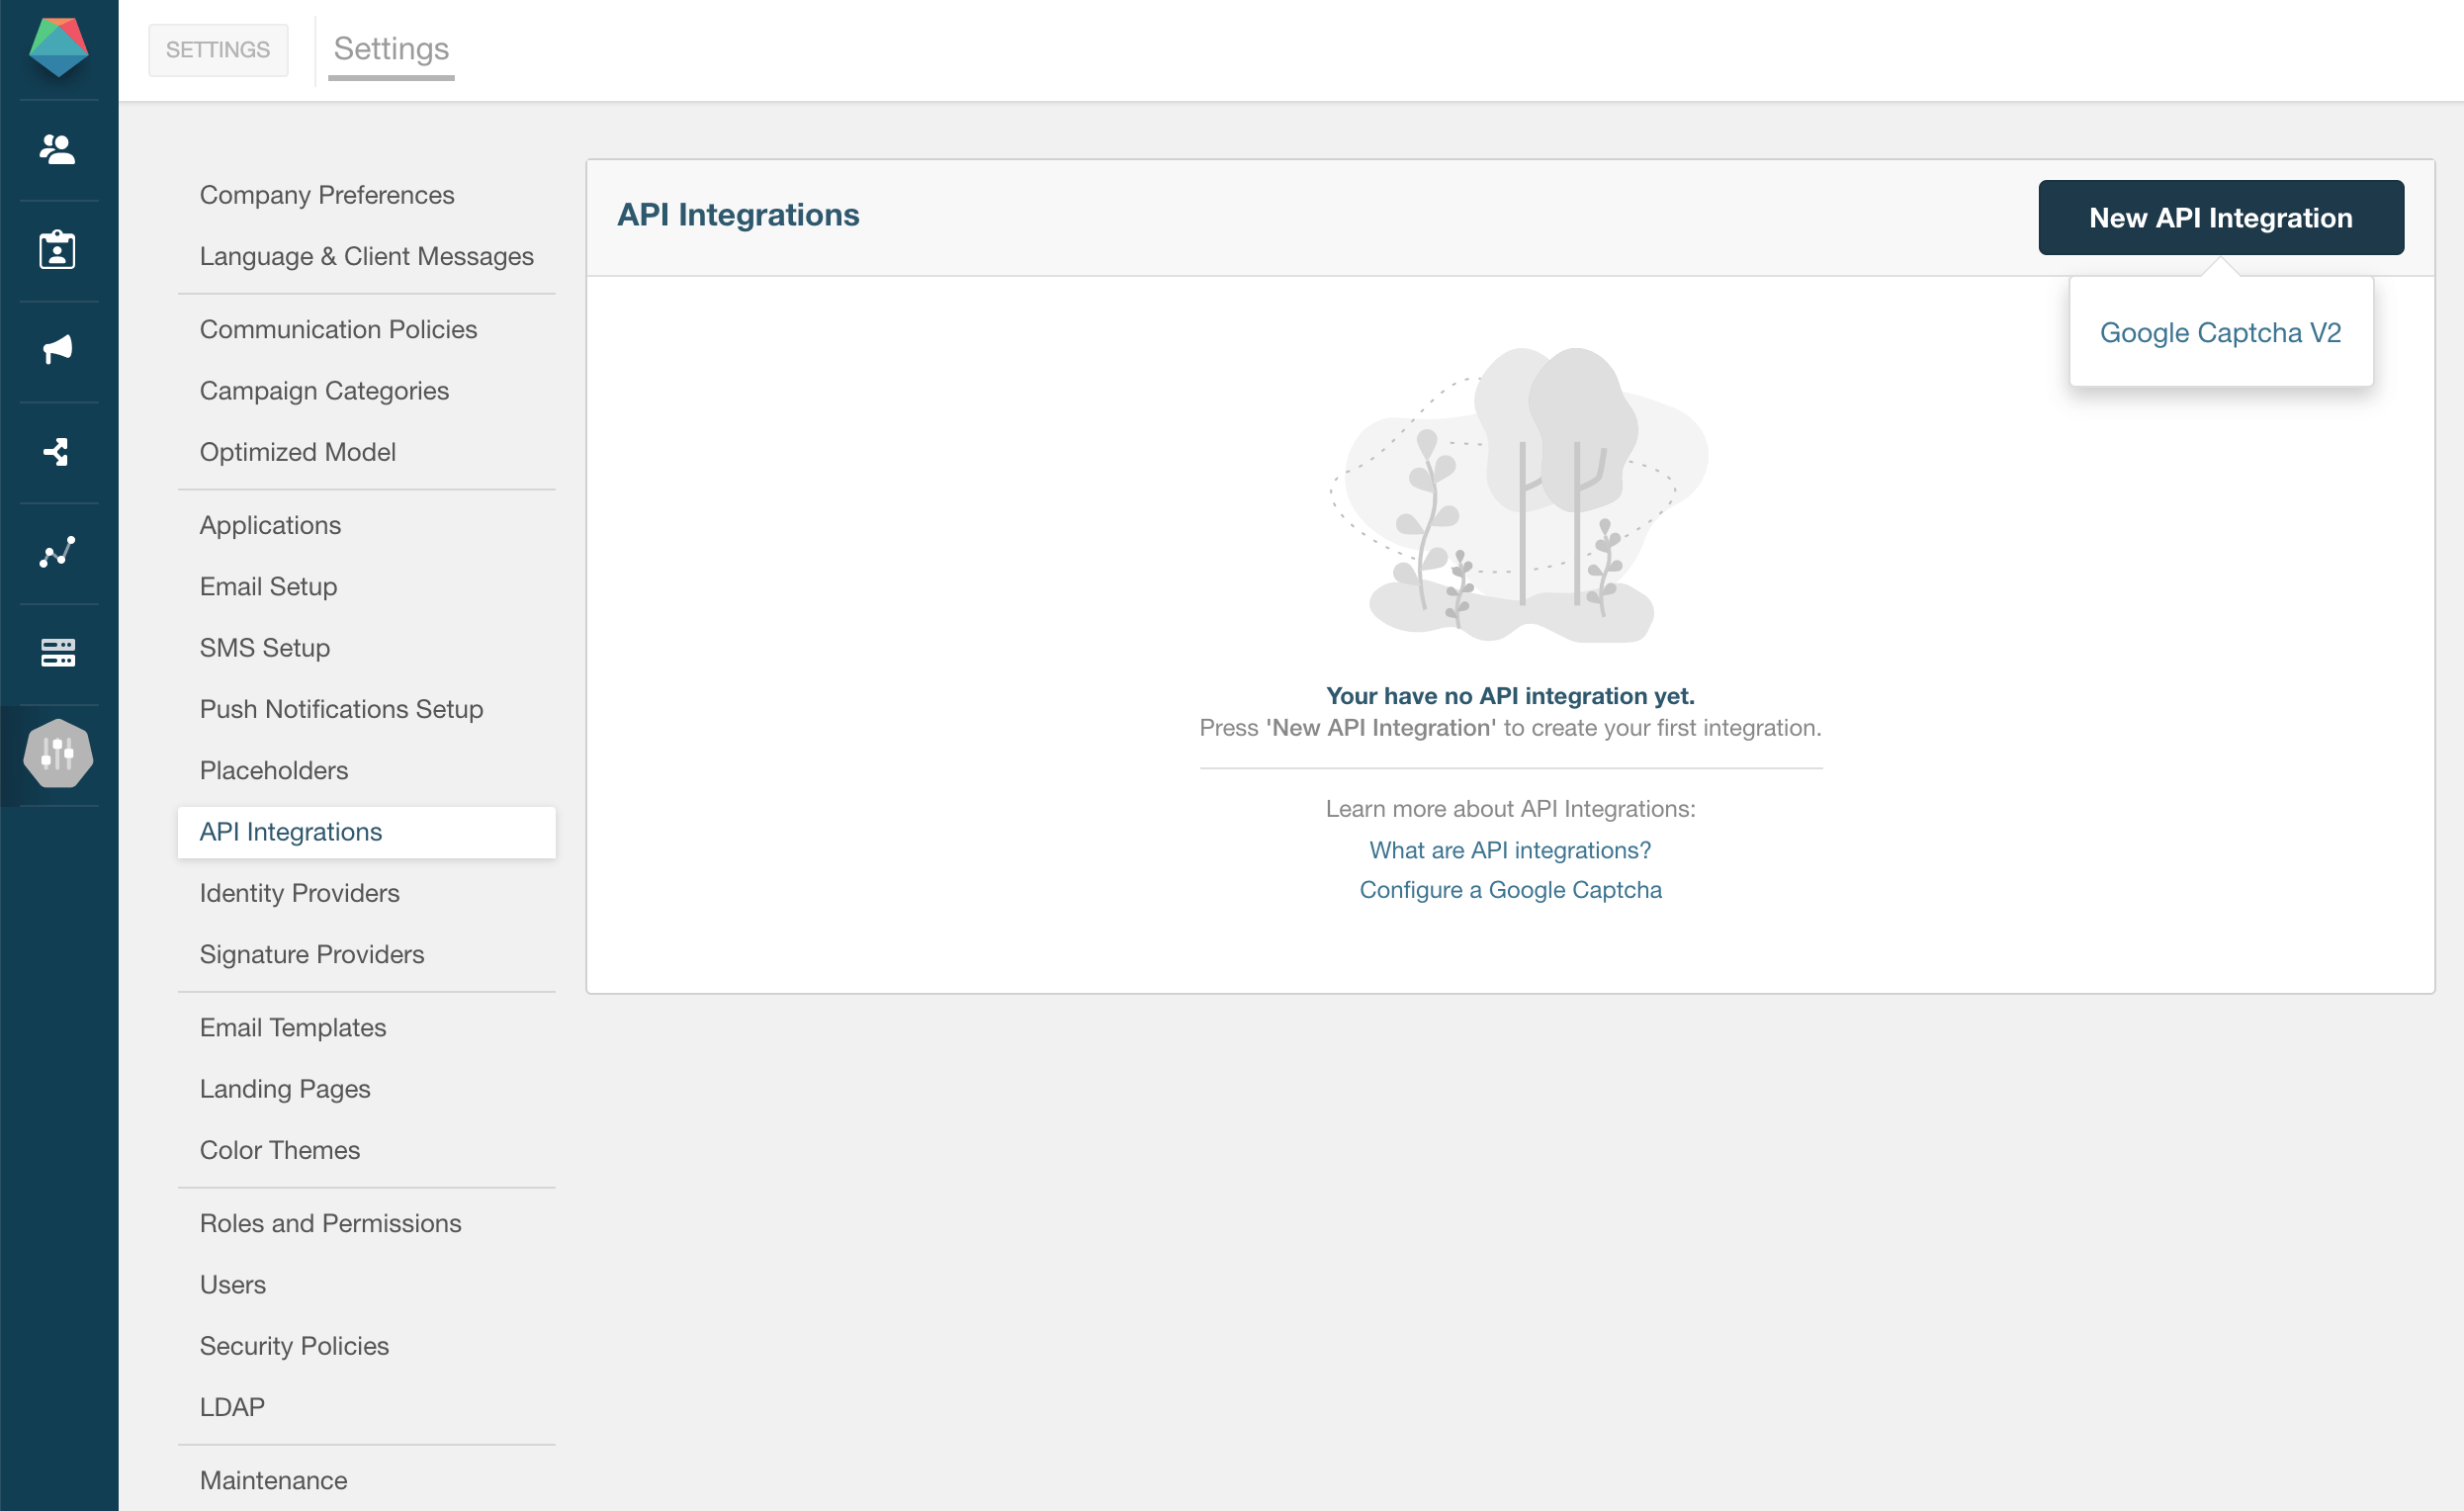
API Integrations #
This section allows to configure the integrations with external APIs quickly and easily. At this time the only available alternative is Google Captcha V2, but others will likely be added in the future.
Google Captcha V2 Configuration #
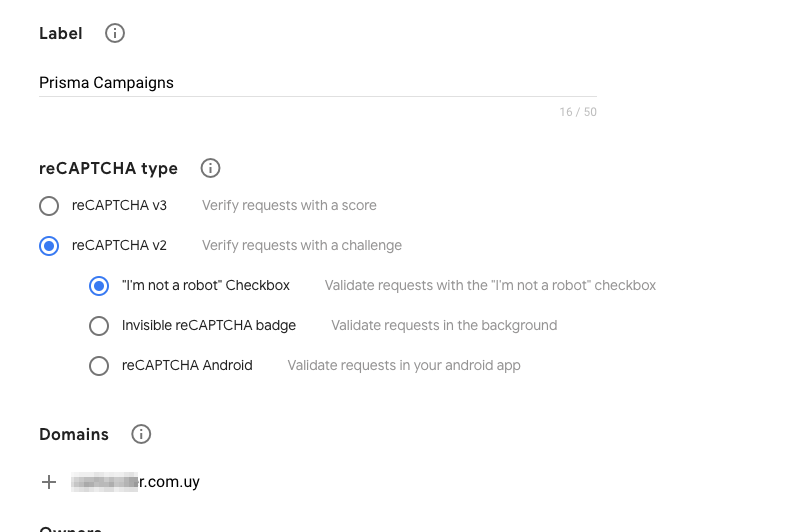
It is worth noting that the initial configuration needs to be done through the Google website. As a first step, you should check the reCAPTCHA v2 and “I’m not a robot” Checkbox radio buttons, and enter the domain where the integration will be put in place:
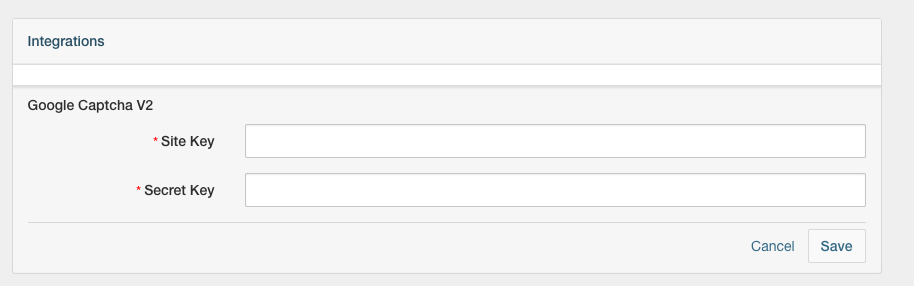
Next, take note of SITE KEY and SECRET KEY, which you will use as parameters while creating the integration in Prisma Campaigns:

To create the integration itself, click + New and choose Google Captcha V2
and paste the site and secret keys obtained previously:
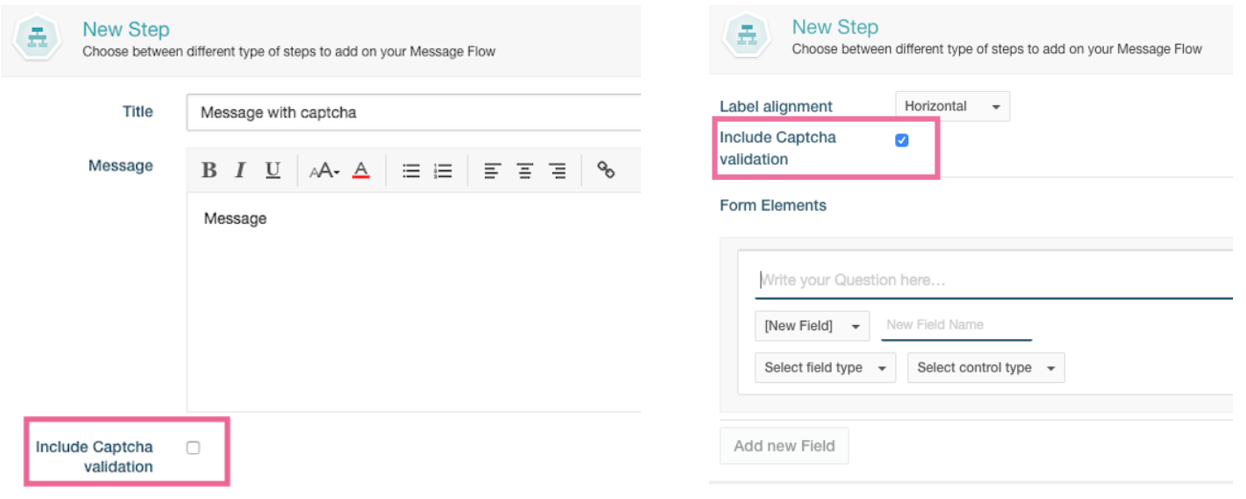
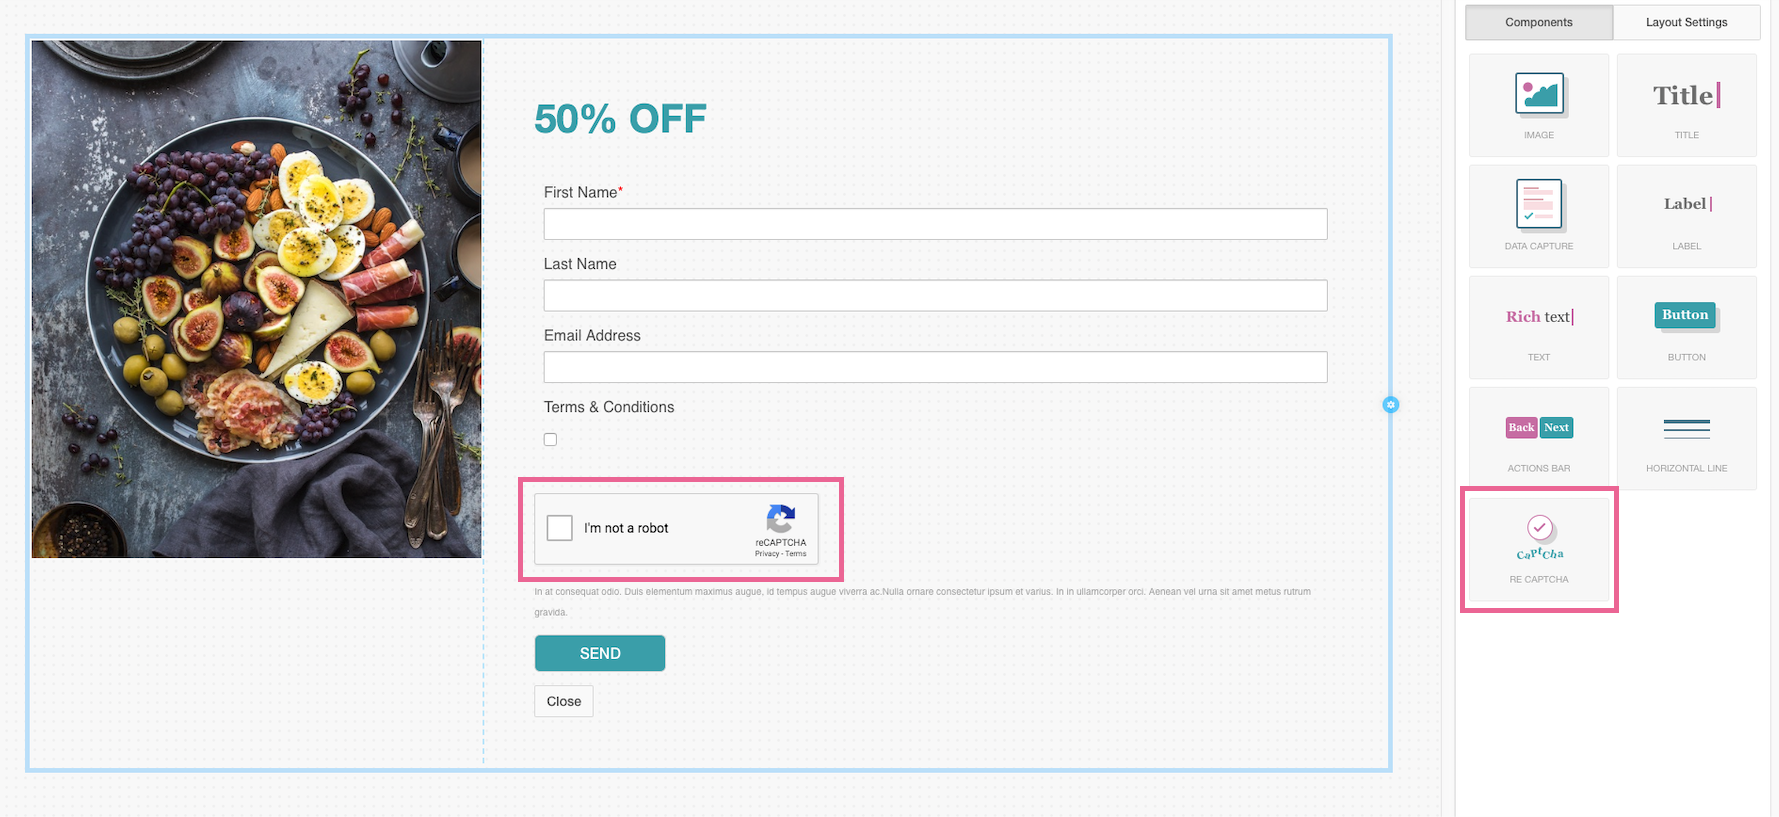
After saving changes, you can start utilizing reCaptcha in a funnel step of any campaign. In case you need to use Message Display or Data Capture steps, it is required to check the Include Captcha validation box as shown below. On the other hand, if reCaptcha is included in a page created through the designer, you can drag and drop the corresponding component to the page directly.
The following image illustrates a form with a reCaptcha validation that was built using the designer:
Identity Providers #
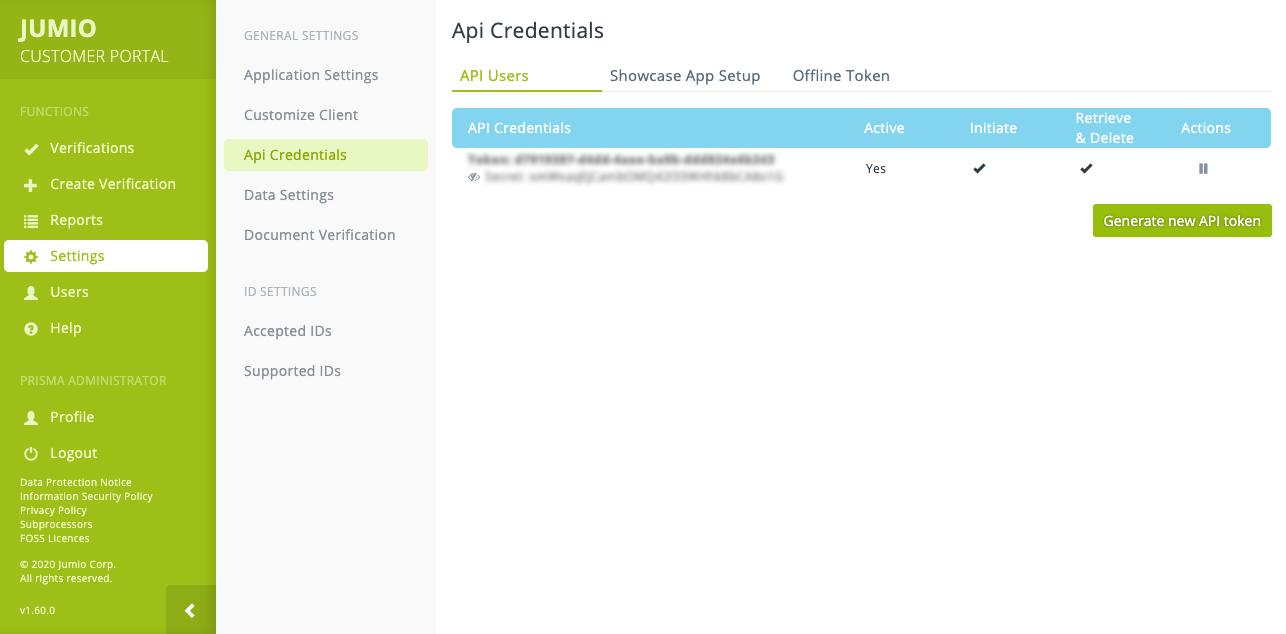
An identity provider is a service that stores and manages digital identities. Through the integration with Jumio, Prisma Campaigns allows implementing identity verification steps in the campaign funnel. To accomplish this goal, you need to create an application in Jumio to get the token and the secret that are required to use the service. Once done, both will be available in the Jumio customer portal under Settings/API Credentials as shown below:
Next, the configuration in Prisma Campaigns is as follows:
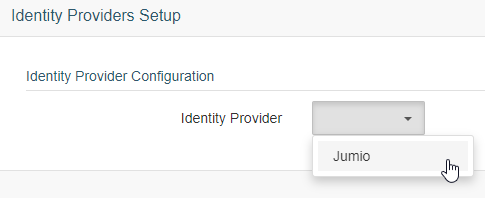
1. In Settings/Identity Providers, choose Jumio from the dropdown list:
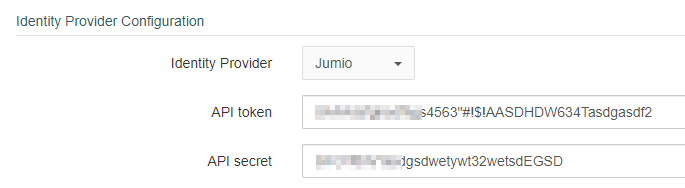
2. Enter the API token and the API secret you generated in Jumio previously:
3. In Id Workflow you will find a list of options to indicate the process that the customer will follow to perform the identity verification in the funnel:
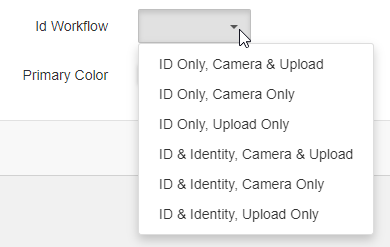
| Workflow | Detail |
|---|---|
| ID Only, Camera & Upload | Identity verification (via passport, national ID, driver’s license, etc.) that lets the customer take a picture or upload an existing file |
| ID Only, Camera Only | Identity verification through picture only |
| ID Only, Upload Only | Identity verification through file upload only |
| ID & Identity, Camera & Upload | Identity verification and proof of life through picture or file upload |
| ID & Identity, Camera Only | Identity verification and proof of life through picture only |
| ID & Identity, Upload Only | Identity verification and proof of life through file upload only |
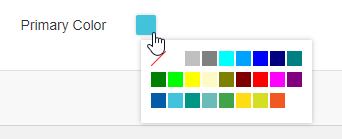
4. If you wish, you can choose the background color for the Jumio interface through Primary Color:
Finally, remember to save the changes by clicking Save.
Signature Providers #
A signature provider allows you to upload digital documents, indicate who needs to sign them (and in what order) and send them to those persons via email. Prisma Campaigns provides an integration with DocuSign that supports adding files in several formats (particularly .docx and .pdf) from multiple storage solutions such as Box, Dropbox, Google Drive, and OneDrive.
To put the integration with DocuSign in place, go to Settings/Signature Providers:
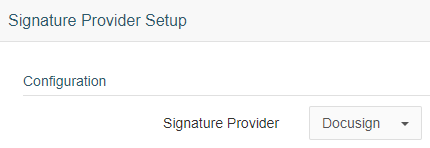
After selecting the solution from the dropdown list as shown above, follow the steps outlined under DocuSign Integration in the Prisma Campaigns help site.
Links Tracker Exclusions #
Prisma Campaigns allows you to exclude the click records on links present in outgoing email communications. This way, you can eliminate those that you do not want to keep and view in the Analysis section. Since the tracking is done by replacing the original link with one internal to the tool, this functionality also addresses scenarios where you want to open a mobile application from an email and keep the URL in the email unchanged.
To do this, go to Settings/Links Tracker Exclusions and simply add the URL or URL pattern that should be excluded from tracking. Next, click Add and then Save to confirm the changes. To remove an exclusion, just press the cross icon on the right of the corresponding row and then Save for the modification to take effect.
![]()
Email Templates #
Within Email Templates, we can define and manage a template to reuse later as needed. This avoids the need to edit HTML code for each campaign. Thus, a user without any HTML knowledge can send emails using the templates by changing only the dynamic sections that apply to the campaign. For more information, please refer to Use your own templates in this manual.
The importance of email templates lies in that they can be reused as many times as needed. By making minor adjustments each time, you can compose messages based on a single template for any campaign that uses the Mail channel. In other words, the use of dynamic sections makes it possible to customize the content and to perform A/B testing.
There are three alternatives to create a new template. In any event, the first step consists of choosing a template name (for example, Homebanking 2021), selecting the preferred option, and clicking Create.
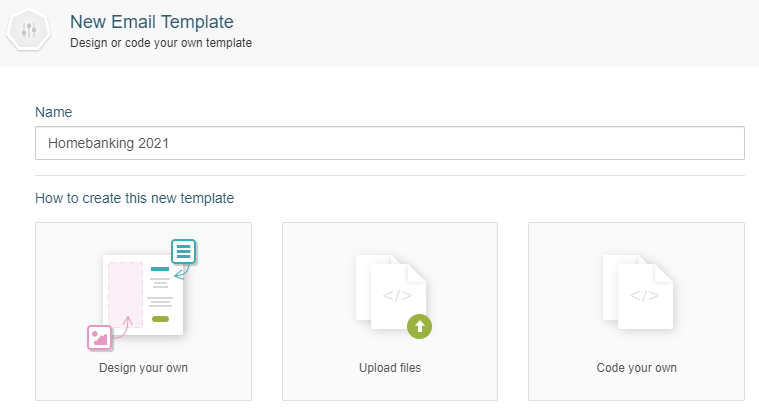
- Design your own lets you drag and drop components on the template body by using the WYSIWYG editor.
- Upload files makes it possible to add images and HTML files created previously with relative paths.
- Code your own not only allows you to write HTML code from scratch but also to copy and paste it from an external resource.
Design Your Own #
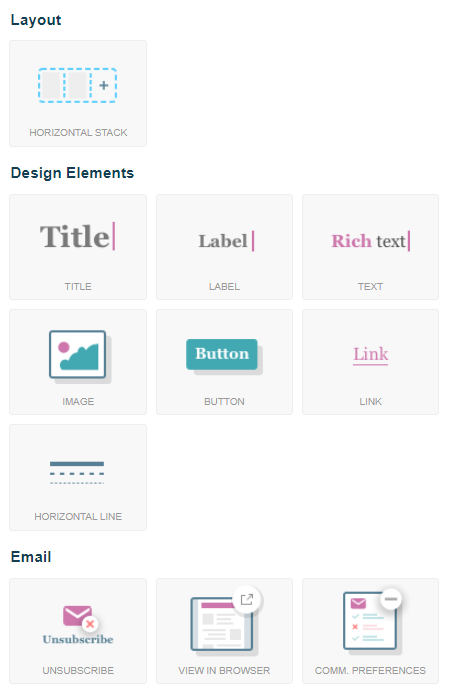
In case you lean towards using the template designer to build one, you will have the following components at your disposal to configure the content:
- Layout: horizontal stack. This component can be used to create a table-like display or container for other elements.
- Design elements: title, label, rich text, image, button, link, and horizontal lines. To find more information about these controls, please refer to Components in the Designer section of this manual.
- Dynamic: placeholders for images or text for the actual email that will use this template.
- Email: add links to unsubscribe, view the campaign in a web browser, and update the customer’s communication preferences.
Additionally, you can also see a button to open the Layout Settings area that allows you to indicate an optional background image or color for your template, as well as its border, padding, and alignment.
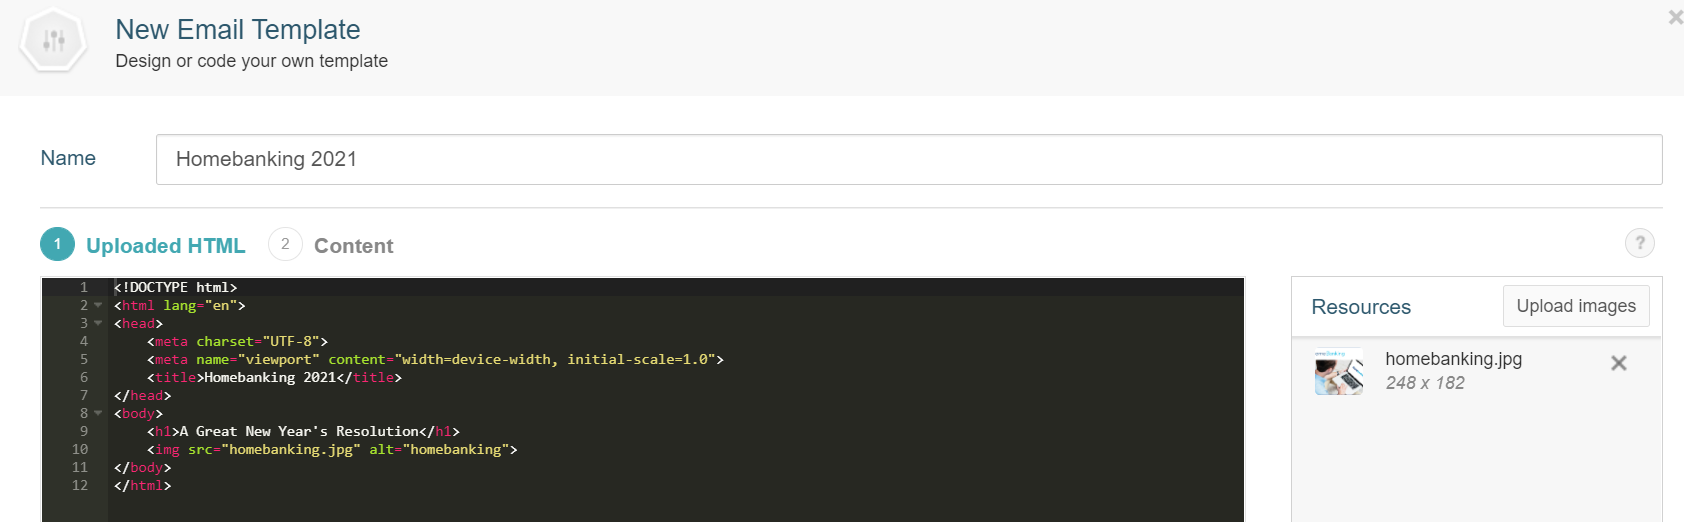
Uploading Files #
When you add HTML files and images prepared in advance, a text editor will appear where you can see the corresponding code and the available image(s). You can add others by clicking on Upload images or access the template preview through Content:
Code Your Own #
As mentioned earlier, dynamic sections can be classified into two categories:
Text: {{dynamic-section}}
Image: {{image.dynamic-image}}
where both dynamic-section and dynamic-image are section IDs in the message body. Each section may be composed of HTML code or an image, and refer to customer or campaign data. For example, {{campaign.link}} may be used in the href attribute that points to the campaign funnel:
<a href="{{campaign.link}}">Click here for more information</a>
Likewise, {{customer.name}} will be replaced by the corresponding customer name in each message.
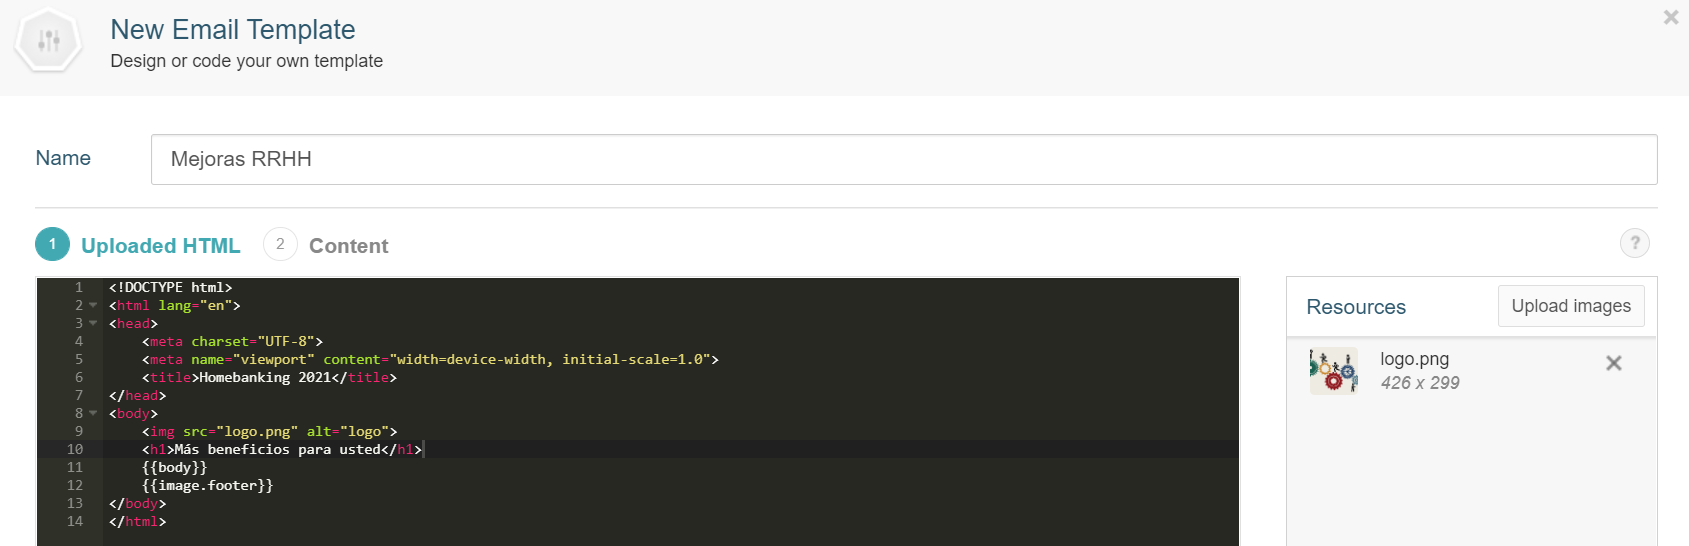
In the following image, we observe a template called Mejoras RRHH where a file called logo.png has been uploaded. This will allow us to insert the image into the message body. Additionally, we can see two dynamic sections: {{body}} (text type) and {{image.footer}} (image type).
Once we save the changes, we can go to the campaign and create a new message. To begin, it is possible to start from scratch or use one of the available templates. After choosing Mejoras RRHH we will see the image it contains (logo.png) and the two sections to be customized. It is important to note that the section names correspond to the identifiers we set in the template previously:
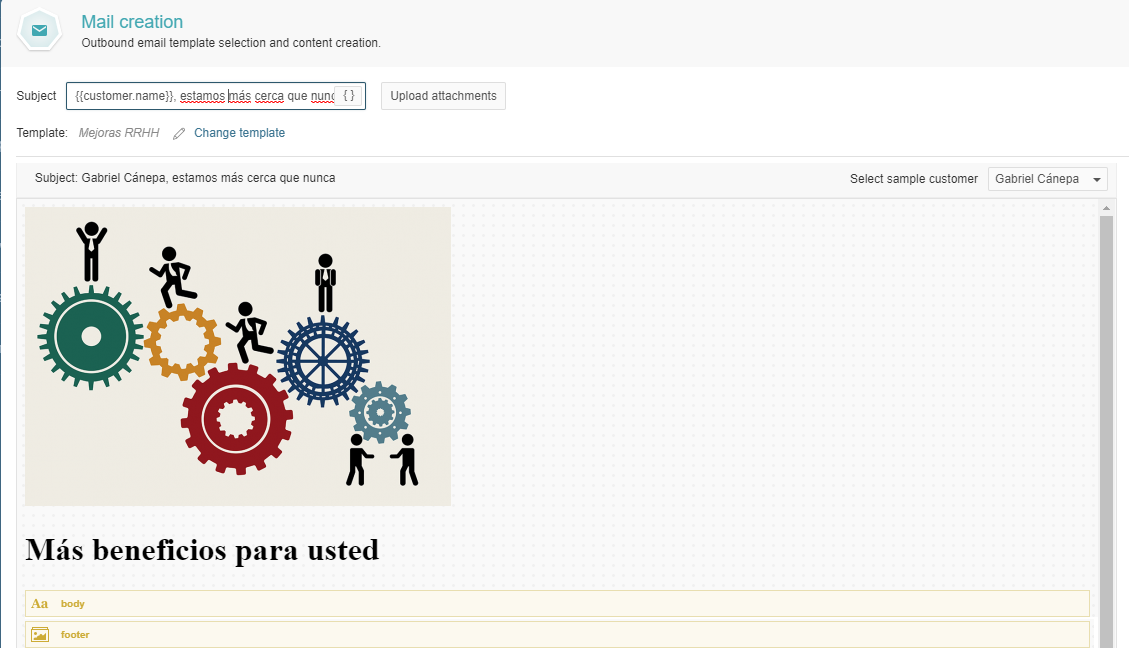
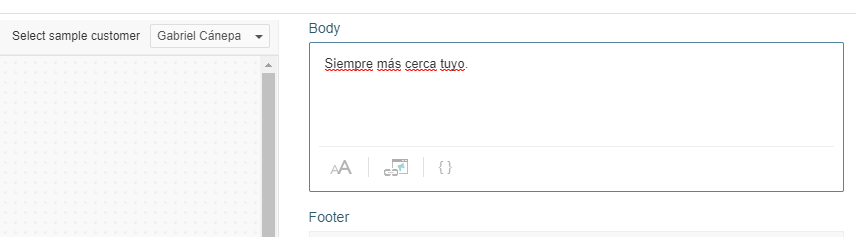
To personalize the content of the dynamic sections, go to the right of the edit window as shown in the above image. At this point, we can type the subject, write the text, and then choose the image for the footer. Optionally, we can attach files to be sent with the message.
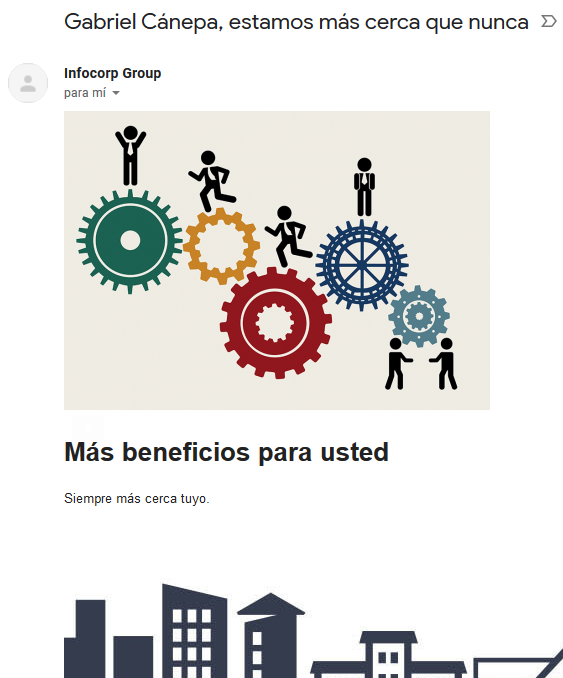
The following figure illustrates the result of a communication sent to a customer using the newly created message:
While the unsubscribe link is automatically added to the footer of all emails, it is also possible to place it elsewhere in the body using the dynamic section {{campaign.unsubscribe}}. Similarly, you can include a link for the customer to modify their communication preferences by adding a link to {{campaign.communication-preferences}} in the href attribute. For more information, please refer to the communication preferences page.
Landing Pages #
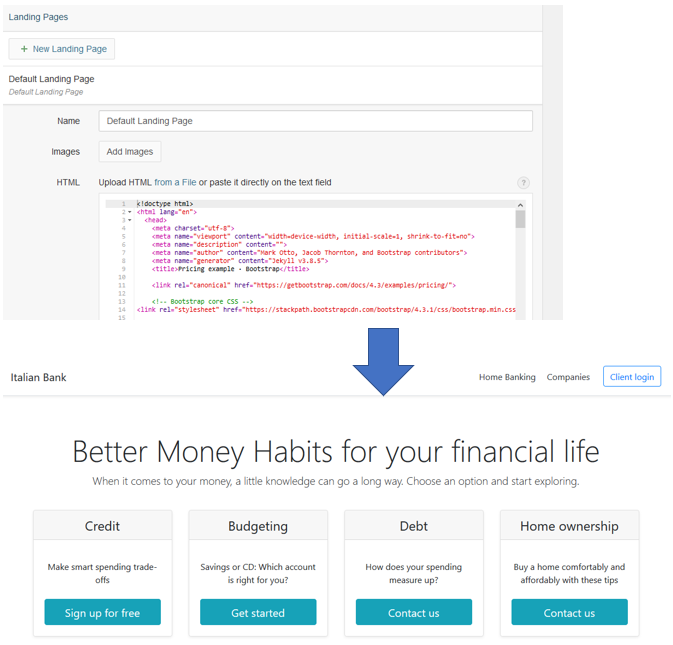
Landing pages (Landing Pages) are web pages where the customer arrives after clicking on banner or text links in another site or email. To create a landing page, you can easily include both HTML code (from an existing file or typing it through the built-in editor) and images.
The following image shows the source HTML code and the result on a browser window:
Based on the plugin they use, there are three types of landing pages:
| Type | Plugin |
|---|---|
| Funnel | {{plugin.funnel}} |
| Unsubscribe | {{plugin.unsubscribe}} |
| Communication preferences | {{plugin.communication-preferences}} |
Regardless of the type, variables such as {{customer.name}} or {{campaign.date}} can be used to customize the content. On the other hand, in the last case, it is possible to hide categories and groups or only the messaging channels, as explained on the Communication Preferences Page.
Color Themes #
Color themes are used to change the look and feel of web pages used in the conversion funnel without editing cascade style sheets (CSS). This submenu allows you to create new schemes, edit the default one (called Default), and change colors (plus font size and type). When you create a new theme, you need to indicate a descriptive name, and then choose the fonts and colors associated with the funnel as shown below:
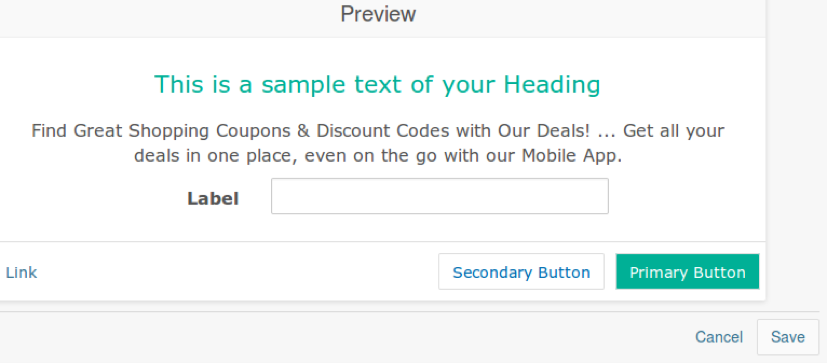
Once the funnel appearance meets the desired expectations, you can save the changes by clicking on Save or cancel the operation by choosing Cancel.
HTML Snippets #
To address the need for more detailed customization in both email and page design, Prisma Campaigns allows the use of HTML snippets. This feature consists of blocks of code that can be added to a page or email layout, enabling you to bridge the gap between the simplicity of the tool and the desire for advanced control over the design with custom HTML, CSS or JavaScript.
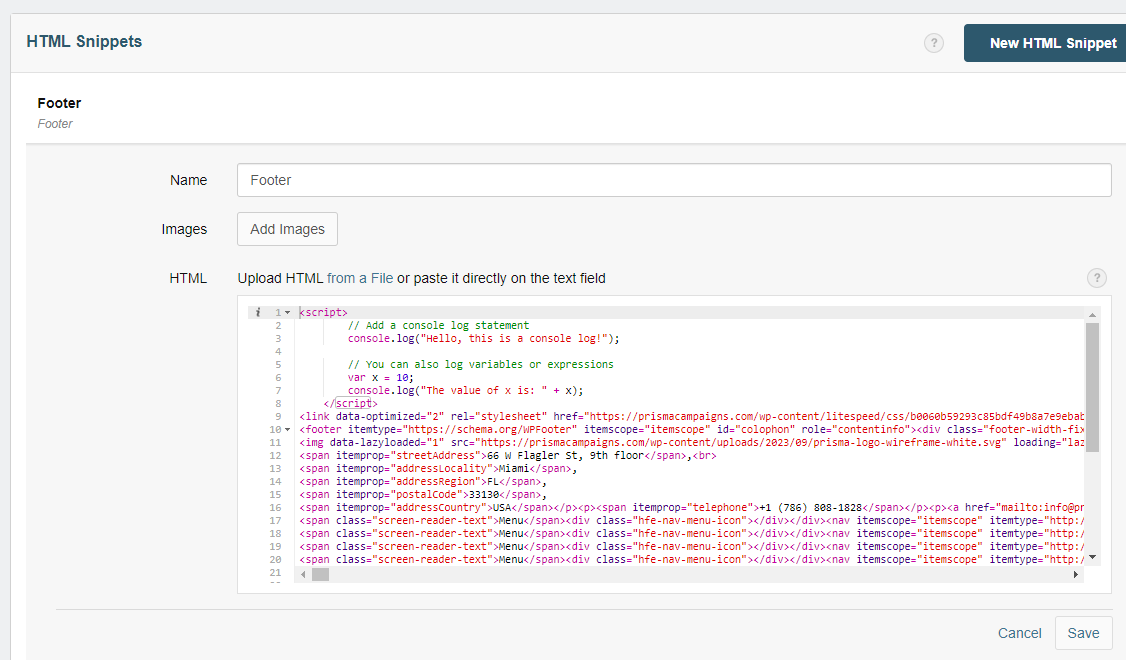
To add an HTML snippet, go to Settings/HTML Snippets and click New HTML Snippet. In the form that appears, enter a name for the snippet, optional images, and the code itself. Finally, click Save to confirm the changes or Cancel to discard them.
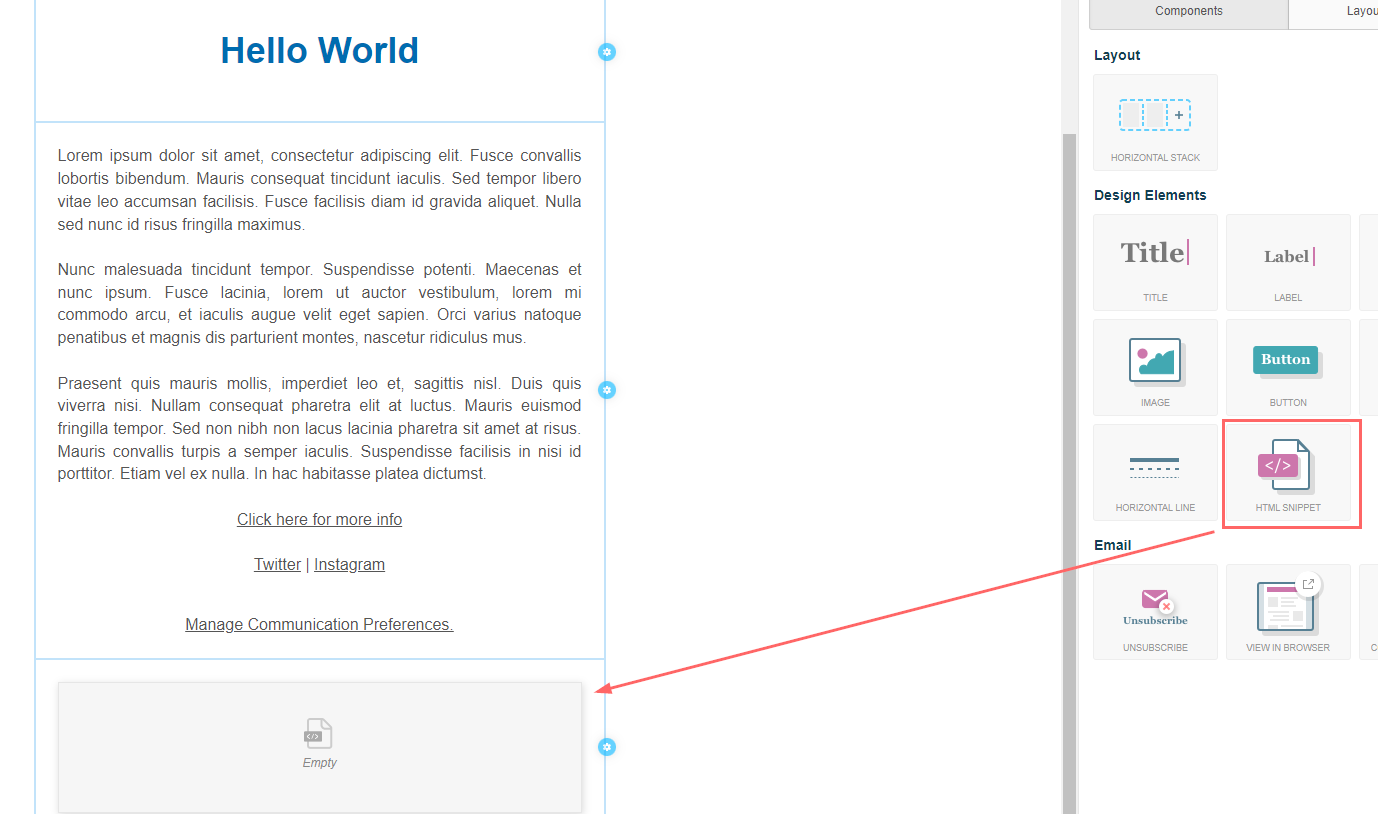
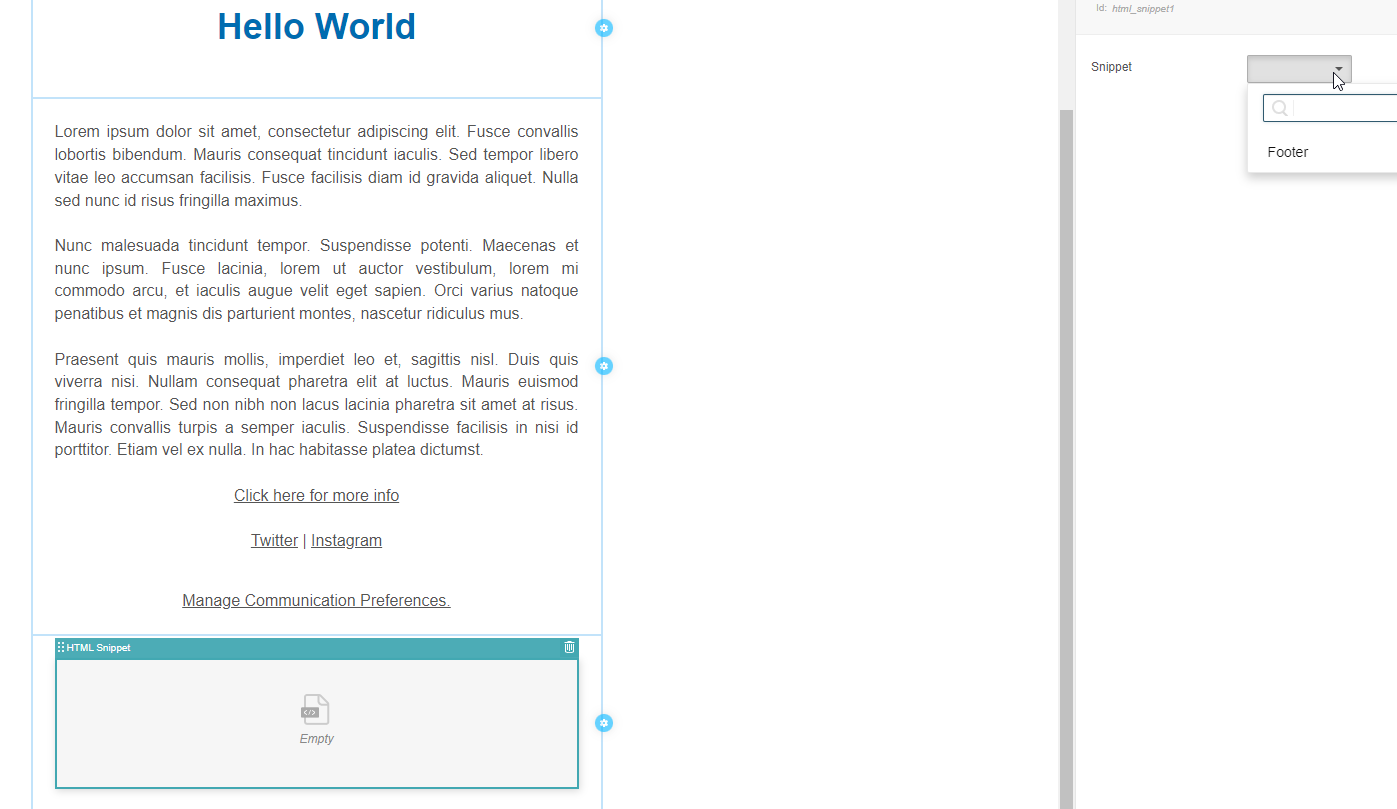
Once the snippet is created, you can use it in the designer by dragging and dropping the corresponding component to the page or email:
The following image shows the snippet called Footer in the list of available components:
Once you choose the HTML snippet, you can see the code in the editor:
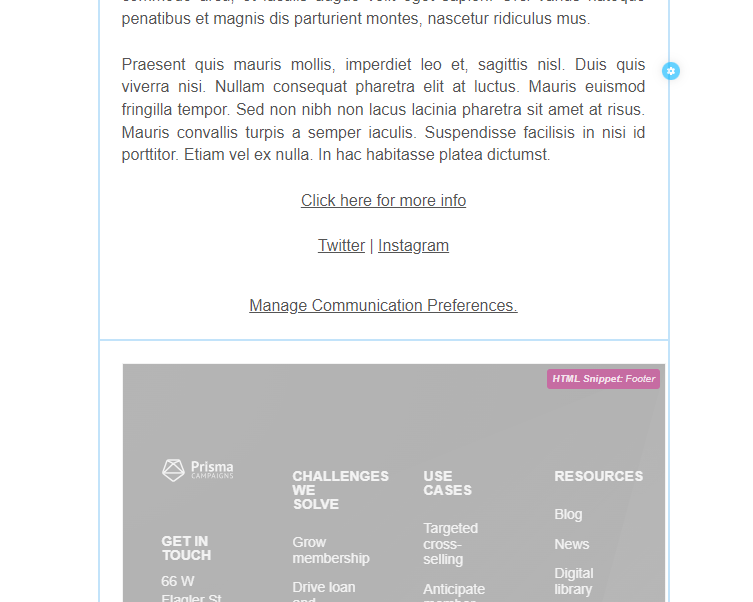
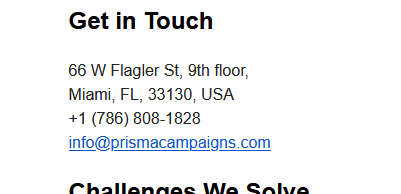
After saving and publishing the changes, the snippet will be visible in the page or email:
Direct Mail Templates #
Templates define the visual design and layout of your direct mail communications, supporting various formats like postcards, letters, and self-mailers. You can create templates of multiple sizes for front and back using the built-in editor or by importing custom HTML files.
The creation of a new direct mail template involves the following steps as you can see in the image below:
- Selecting a template name.
- Choosing the format type and side.
- Adding optional images.
- Entering the HTML code manually or by importing a file.

With the ability to personalize content using dynamic variables like {{customer.name}} or {{customer.address}} -among others-, you can create a single template that can be reused for multiple campaigns.
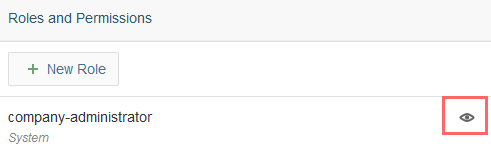
Roles and Permissions #
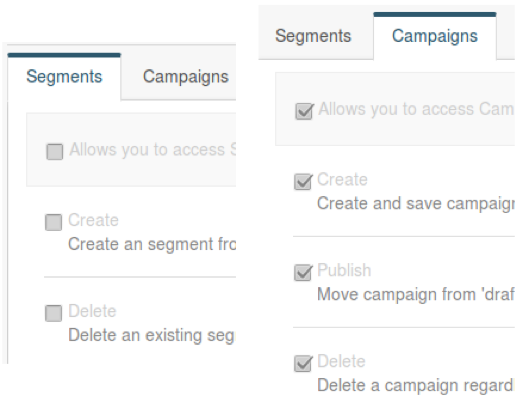
This section will allow you to specify the actions available to users who have a given role. To accomplish this goal, you can use one of the existing default roles, or one created afterwards. To display this information, click on the eye icon at the right of each row.
For example, users who have the role under observation can perform all the tasks related to campaign management. However, the same role does not allow to carry out the actions associated with segments as we can see in the image below:
The list of default permissions by role is as follows:
company-administrator has total permissions on all functions and modules.
designer can only create, modify, delete, and activate campaigns (move them from draft to production mode).
publisher allows you to perform the same actions as designer except deleting campaigns.
security can set roles and permissions, manage users within Prisma Campaigns, set security policies, and configure authentication using LDAP.
segment-manager can execute all segmentation-related responsibilities (create, modify, and delete segments). More details on these tasks are given in the next chapter.
When you create a new role, the specific permissions that will be granted in each module can be set by ticking the checkboxes shown above. It should be noted that the default roles cannot be modified.
API Keys #
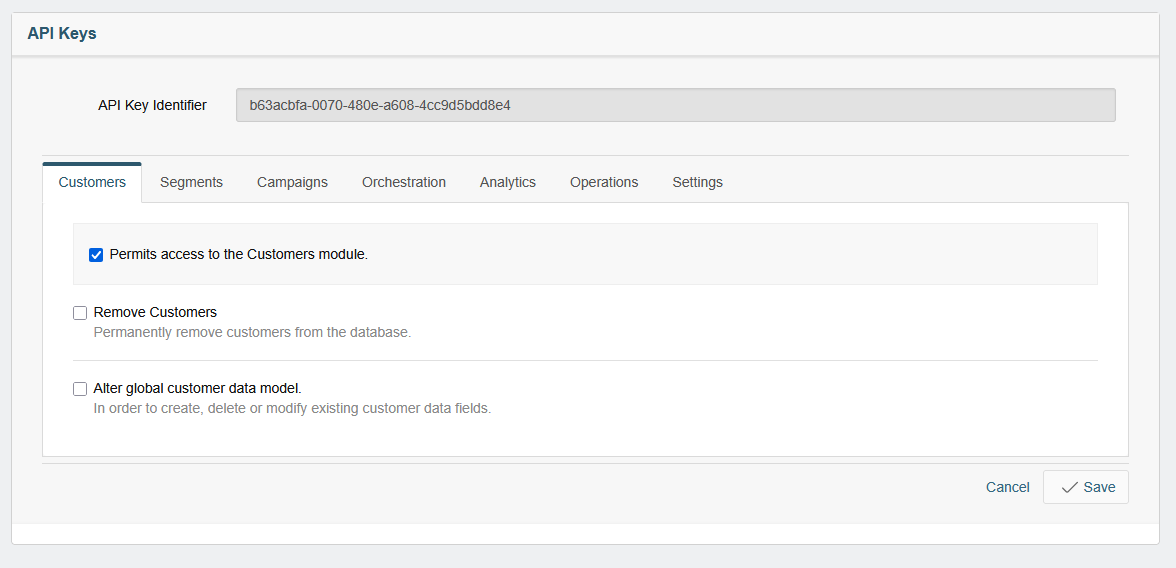
Prisma Campaigns offers the possibility of using API keys for financial institutions to retrieve customer information directly from their instance.
Each request made to access customer information requires Bearer token authentication using an API key -which is unique to your financial institution- in the Authorization header. Before use, this key must be generated with the Permits access to the Customers module checkbox enabled:
Using API Keys #
The available information can be obtained by making a GET request to the customer endpoint. The target URL for this request is structured to include your instance’s subdomain and a unique identifier for the particular customer in question. The request must include the Authorization header (containing the Bearer token with your API key) and the Accept header, which should be set to application/json to specify the desired response format.
Upon a successful request, the system will return the customer information in JSON format. This response will contain the data available for the specified customer within your Prisma Campaigns instance as illustrated in the following example:
curl -H "Authorization: Bearer b63acbfa-0070-480e-a608-4cc9d5bdd8e4" \
     -H "Accept: application/json" \
     https://bankofholland.prismacampaigns.com/api/customers/find/bFNsbkhoY3ZKRmdvNVAzVm1LNlJjd90z
The previous command returns a JSON response with the following structure:
{
  "tags":[17592213056255],
  "name":"John",
  "updated-by":[{"id":17592213056257}],
  "last-update":1678869745683,
  "mobile-registrations":null,
  "id":"bFNsbkhoY3ZKRmdvNVAzVm1LNlJjd90z",
  "last_name":"Doe",
  "Email_address":"johndoe@bofh.com",
  "full_name":"John Doe"
}
It is important to note that maintaining the security of API keys is critical. Therefore, they should not be exposed in client-side code or placed in a version control repository. Additionally, as a standard security practice, it is recommended to rotate them regularly.
Users #
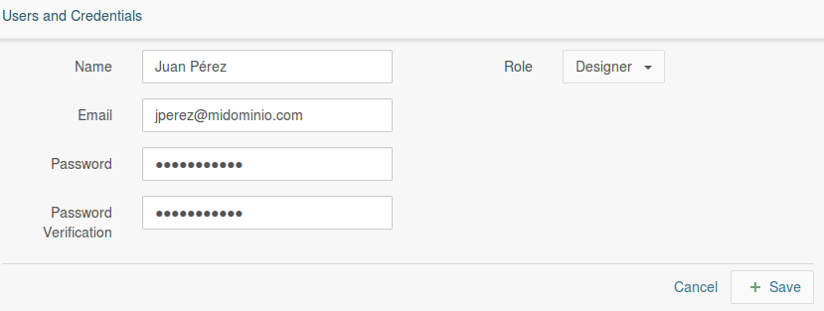
Through the Users menu, you can create new accounts that can access the tool if LDAP is not in use (see details below) for authentication. In addition to the name, email, and password of the new user, you will need to choose a role among the ones listed in the previous section. After filling in all the required fields, click Save to create the account or Cancel to discard the operation.
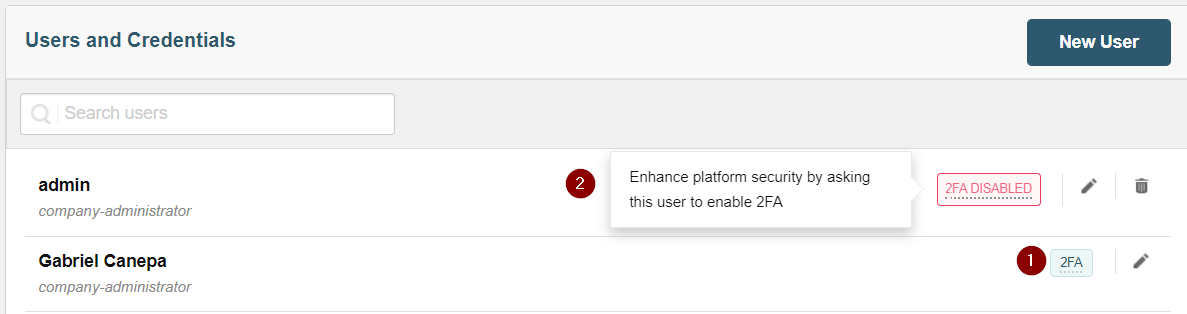
The accounts with 2FA enabled will display a label (1), whereas those without it will show a call to action (2):
User accounts can be modified at any time by clicking the pencil icon in the corresponding row of the users list.
Security Policies #
Security policies (Security Policies) are used to establish rules to protect user accounts and sessions initiated through the web interface of Prisma Campaigns. Among the available configuration variables, we can mention the complexity required for passwords, enabling password history and expiration dates, maximum failed login attempts before locking the account, and session timeout.
To confirm or discard the changes, click on Save or Cancel, respectively. Alternatively, it is also possible to restore settings to the default (minimum security) values for each variable.
LDAP #
If MS Active Directory or OpenLDAP services are available, you can utilize LDAP for user authentication. In this case, accounts will not be stored within the tool as explained above. It is important to clarify that LDAP groups must match the roles created in Prisma Campaigns, which is where permissions for each role are defined exclusively. For example, if LDAP has a group called CommercialIntelligence which needs access to segmentation tasks, you will need to create a role with the same name in Prisma Campaigns and set the permissions accordingly.
After entering the required connection details, we can check it by clicking on Test Connection. Once we have completed the LDAP configuration as explained, we can use a one-time username and password to ensure that the connection can be established.
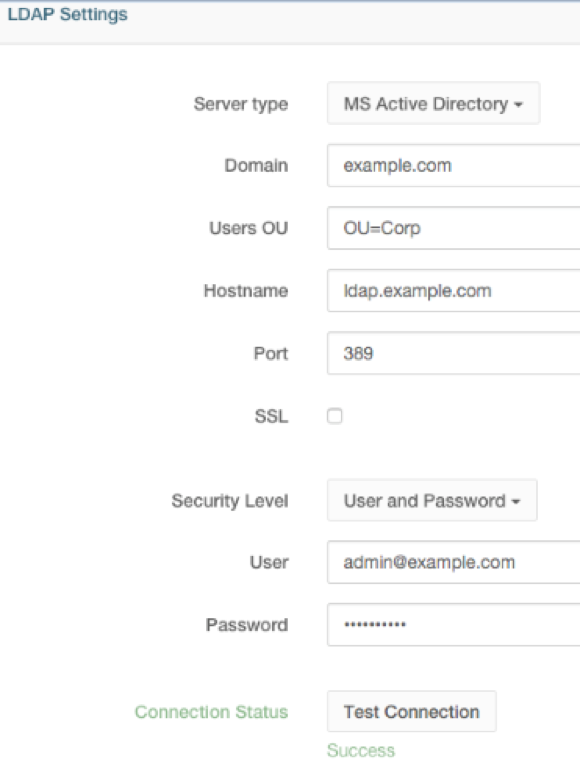
In the form shown above, we used the following data to illustrate:
In Domain, enter the corresponding LDAP domain (for example, example.com).
Hostname indicates the server’s name (ldap.example.com) or IP address.
Users OU represents the organizational unit where the authentication mechanism will search for users (OU=Corp in this example).
Port is the LDAP port (usually 389/TCP or 636/TCP, if SSL is supported).
Keep in mind that if User and Password is chosen in Security Level (instead of Anonymous), valid LDAP credentials (username and password) will be required to check the connection.
Maintenance #
This section allows to configure clean-up rules that are executed once a day during the night time. By removing obsolete data and past communications, you will be able to:
- Manage disk space used by the tool more efficiently
- Ease the backup process
- Increase query performance
- Optimize overall system operation
To create a new maintenance rule, click Add New Rule and add at least one condition through New Condition under Remove Customers or Remove Communications. The image below shows an example where all anonymous clients older than 3 months will be deleted. In addition, all communications from the Promociones category where the customer unsubscribed more than 1 year ago will be eliminated as well:
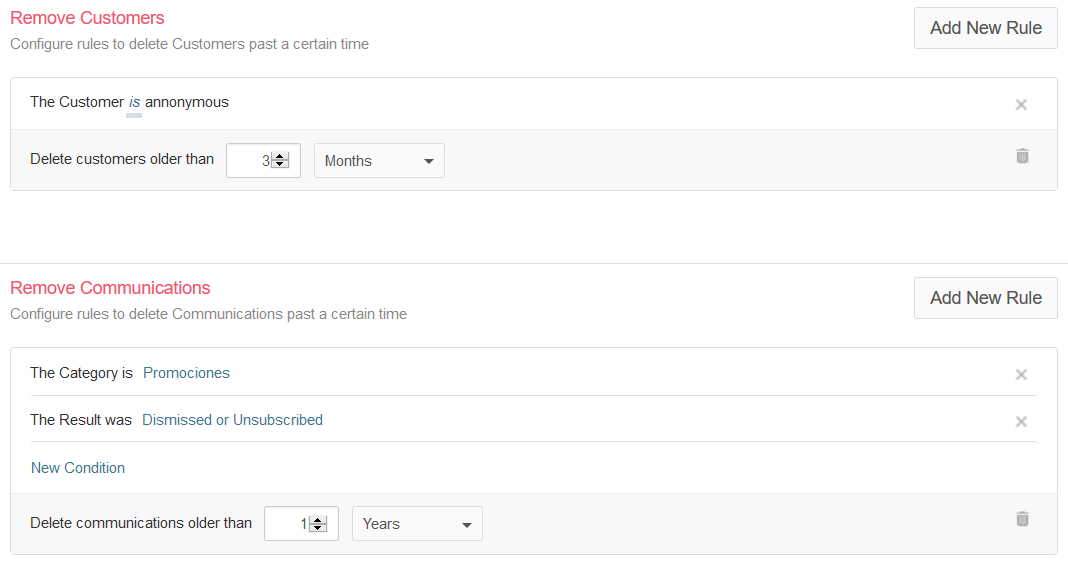
The new rule will take effect once you click Save Changes. It is important to clarify that it is not possible to save rules without conditions. If you attempt to do so, you will get an error message stating that the rule is too broad and a reminder to add at least one condition.
Automatic Data Synchronization #
Regardless of the specific operation, the purpose of automatic data synchronization is the same: keep the application in sync with the data sources it uses. In this section you can configure the import (Add Import), export (Add Export), and removal (Add Removal) to be performed manually, one-time only automatically, or recurrently.
The operations listed above allow to carry out the following actions:
Importing customer, campaign data, or unsubscriptions. It is worth noting that customer imports will keep the client list updated instead of creating a new one during each operation. To illustrate, let us suppose that the below records are imported at a given time (where the first field serves as an identifier and the next two are first and last name, respectively):
1,Juan,Galvez
2,Esteban,Galante
3,Emanuel,Palacios
Next, consider that a subsequent import includes the following customers:
1,Juan,Galvez
4,Francisco,Pisani
The final customer list will be:
1,Juan,Galvez
2,Esteban,Galante
3,Emanuel,Palacios
4,Francisco,Pisani
In other words, omitting existing clients does not does not remove them from the list. The only way to delete customers is to resort to an explicit removal as explained later in this chapter.
Exporting clients, campaign results, or unsubscriptions.
Removing clients or customer-related data.
In any event, setting up an automatic data synchronization requires an operation ID (descriptive name), type of data to import / export / remove, source or destination (as appropriate), and frequency.
Import #
Let us consider an import operation called Clientes de CRM:
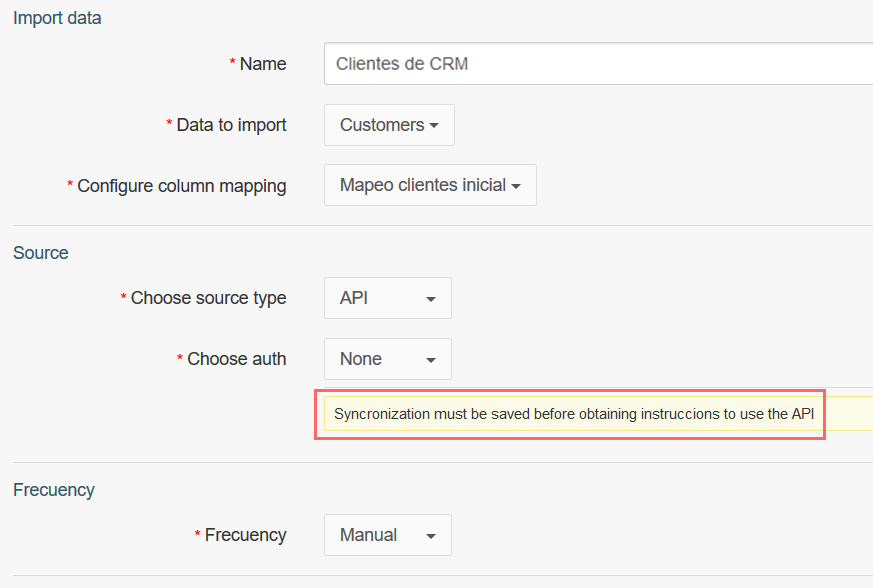
The above image shows the following:
Clientes de CRM will be used to import customer data (as we can see next to Data to import). Alternatively, you can also choose campaign data from the same dropdown list.
The data source will be an API (Application Programming Interface). Before you can obtain the instructions to use the API, you need to save the sync. The authentication type is another required setting (None in this example, but basic authentication with username and password is also available). In the case of basic authentication, the word api that is used as username and the password is a token that Prisma Campaigns creates when the sync is saved:
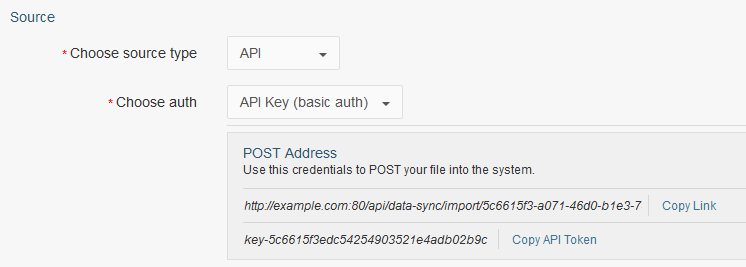
The communication with the API is done through a POST operation, which allows you to send data to an application as application/x-www-form-urlencoded (key/value pairs) using the tool or programming language of your preference. The parameters to be passed are username and password (only when basic authentication is selected) and the name of the file to be sent as we can see in the following example with curl:
curl -F "file=@files/clientes-crm.csv" -u api:key-5c6615c001ce44a7a57e8d794fe07df1 http://example.com:8080/api/data-sync/import/5bfea908-d546-440e-971d-78bb7403c847
where
-Femulates an HTML form.The @ sign indicates that the file found at files/clientes-crm.csv will be uploaded.
-ushould precede the username (api) and the password or key (key-5c6615c001ce44a7a57e8d794fe07df1 in this case).The destination URL (http://example.com:8080/api/data-sync/import/5bfea908-d546-440e-971d-78bb7403c847) is also provided by Prisma Campaigns when the sync was saved previously.
For more information on the synchronization frequencies, please refer to the corresponding section in this manual.
After saving the changes, the newly created sync will appear in the list of existing operations as we can see below. If you click on the sync name, the API URL will be displayed. After a series of operations have been performed, the last 10 results will be available in the same view:
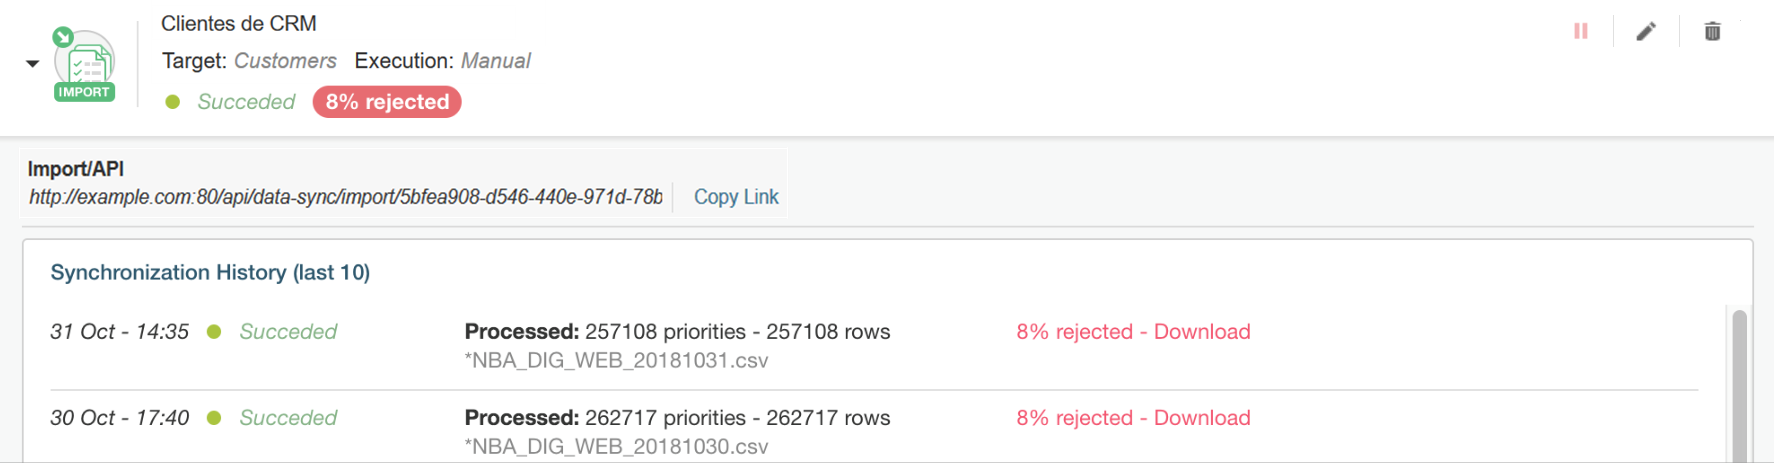
To suspend, edit, or remove a data sync, click the pause, pencil, or garbage can icons at the top right corner, respectively.
The particular instance in the image above shows two calls completed on October 30th at 5:40 pm and October 31st at 2:35 pm. In both cases, the 8% of the file was rejected. To inspect the records that could not be imported, you can download a report by clicking Download.
Export #
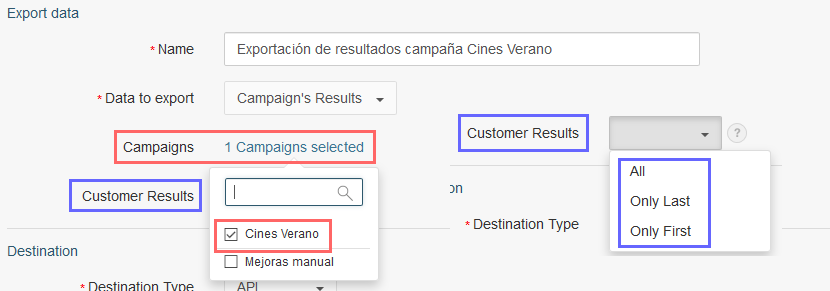
To appreciate the creation of an export data sync more in detail, the image below shows the first part of the process which consists of:
Choosing a descriptive name for the export (Exportación de resultados campaña Cines Verano in this case). The purpose of this data sync will be to keep the results of the campaign named Cines Verano up to date.
Selecting one or more campaigns and the results to be included in the data sync. The meaning of each option is the same as when exporting campaign data:
Only Last (default) will cause only the last result to be exported, whereas Only First indicates that only the first result of each client should be taken into account.
All means all final results (converted, dismissed, or unsubscribed) will be exported, which may comprise more than one record per customer.
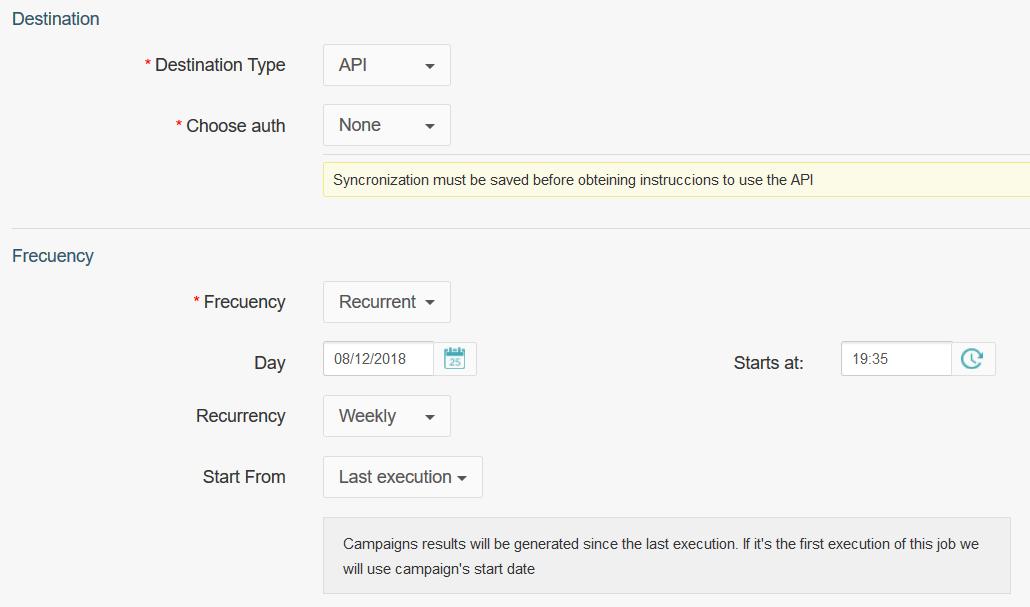
Additionally, the following facts are illustrated below:
The destination will be the API and the operation will not use any authentication.
The task will be performed recurrently each week, starting on December 8th, 2018 at 7:35 pm
Finally, Start From represents the reference point for the export. If you choose Last execution, results will originate incrementally starting with the last report execution date. Other alternatives are the campaign start date and consecutive days. In the former, the results will be originated beginning with the campaign start date up until the moment when the sync takes place, whereas the latter scenario will only include results from the last X of days.
If you wish to export data from two campaigns or more simultaneously, the corresponding results can be combined if you tick the checkbox Consolidate common campaign results in the same columns:
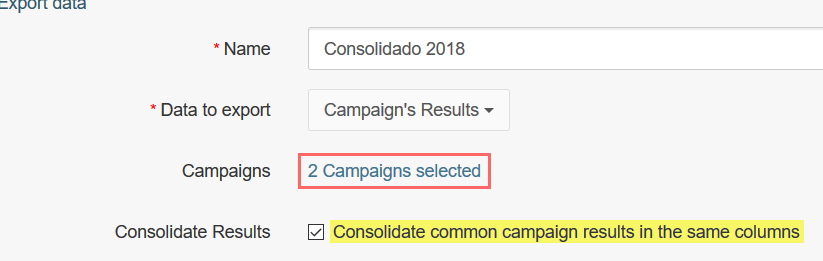
For instance, let us suppose that the two campaigns in the above image have the following names and export fields:
Campaign A: client ID and name.
Campaign B: client ID and name.
The expected results will be the following:
If you choose to consolidate results, the output file will consist of two columns (client ID and name). The file will include all results from both campaigns, one after the other.
Without consolidation, the output file will have four columns (Client ID A, name A, Client ID B, name B) with the corresponding data.
In summary, results consolidation allows to combine the common fields of the selected campaigns into a single file. Otherwise, fields from each campaign would be exported individually.
Changes will take effect after clicking Save, after which you will obtain the API URL to be used.
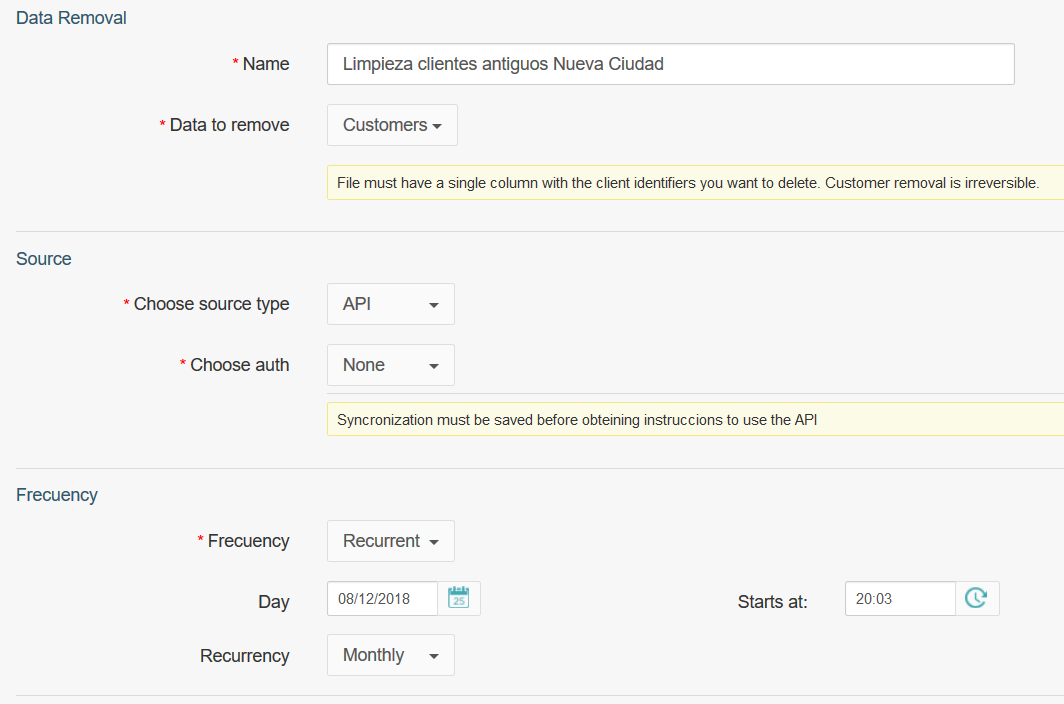
Removal #
The purpose of this operation is to remove clients or certain customer data. To accomplish this goal, it is necessary to use a file with the corresponding client IDs or a column mapping that includes the fields that will be deleted, respectively.
Client or customer data removal must be performed with care because the changes are irreversible.
After setting up the previous 2 data synchronization tasks (campaign results export and customer removal) we can see them in the list shown below:

It is worth noting that both the data export and the removal operations can be disabled, updated, or deleted using the same method as explained for data import tasks.
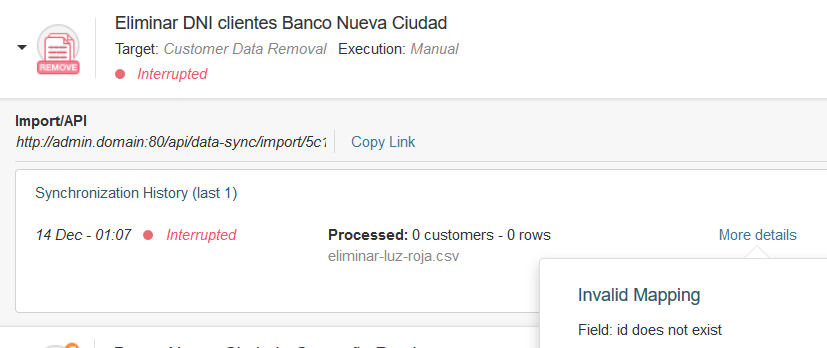
Most Frequent Errors #
During the data sync process, you may run into the following errors:
- Invalid mapping. For instance, if the file being used does not have a column named id, the customer removal will fail to identify which clients it should delete:
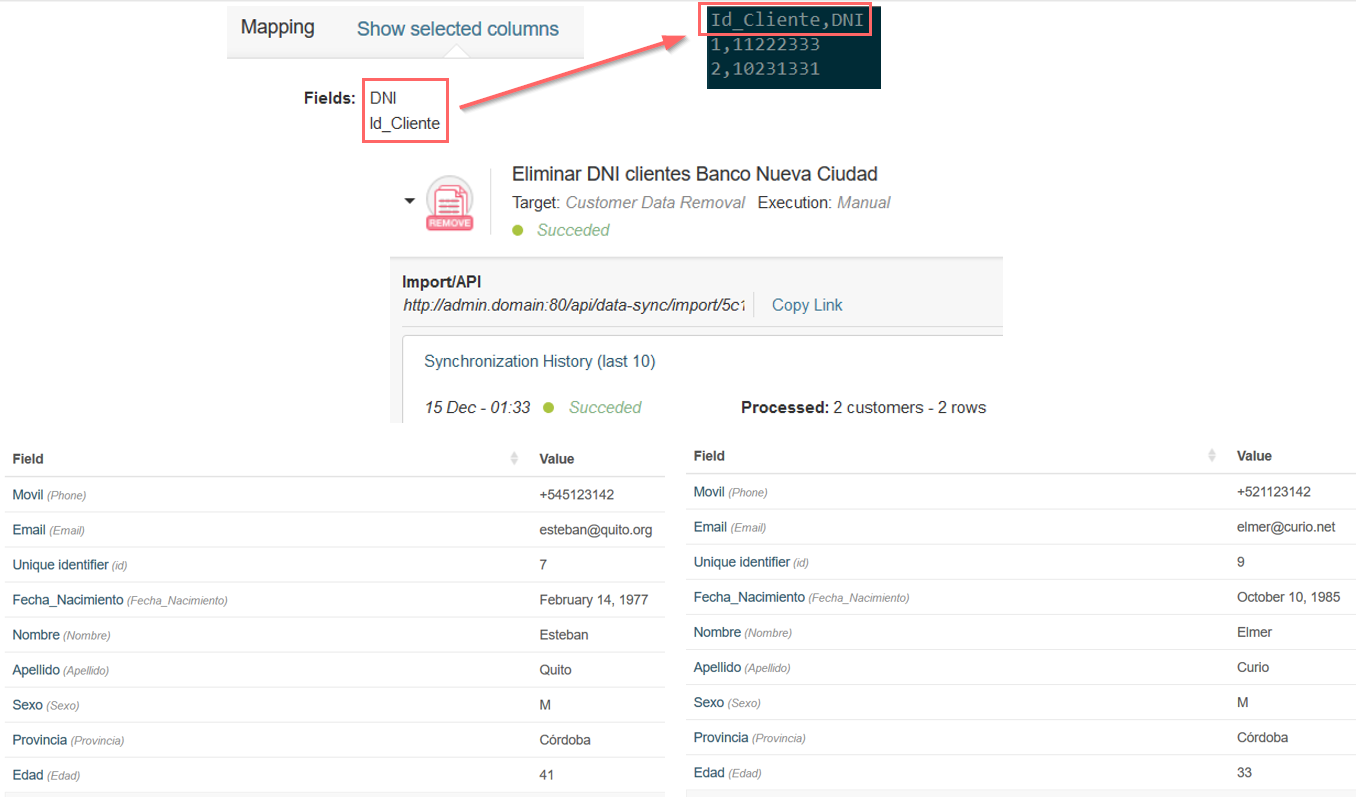
The same would happen if you try to remove customer data without specifying all the columns from the corresponding mapping. To address this problem, the fields of the file must match those in the column mapping. To illustrate, let us consider a file that contains the lines below:
Id_Cliente,DNI
9,31101998
7,24664987
Before you can use such a file to remove the field named DNI from clients with IDs 7 and 9, the sync must be configured with a mapping that includes the fields Id_Cliente and DNI. The following image shows the result of a successful operation that deleted DNI from the respective customers.
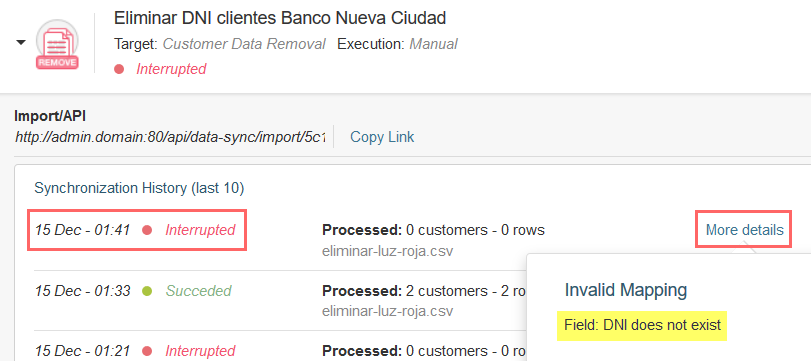
- Missing column. As seen below, the same operation failed when a separate file was uploaded due to the DNI field (required) being missing. Keep in mind that this field is part of the mapping used in the data sync.
- Missing file. If a scheduled sync (either recurrent or single use) was executed without previously sending a file through the API call, the error shown below will occur:
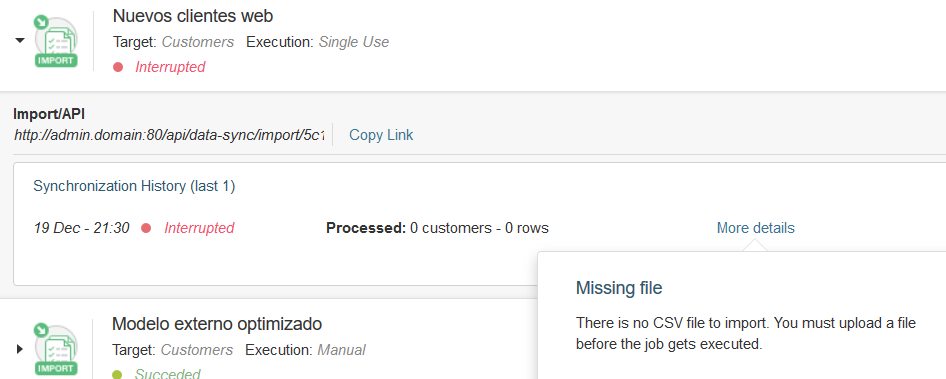
To solve this difficulty, you will need to reconfigure the operation to run after providing a valid file.
Column Mappings #
The main purpose of this tool is the automatic synchronization of data, as explained in the corresponding section. Through column mappings, the platform makes it possible to:
- Specify which customer and campaign data will be imported (or deleted).
- Indicate the relationships (if any) with the current data model.
- Transform data using one or more of the functions detailed in Available transformations
- Create calculated fields from operations on one or more fields.
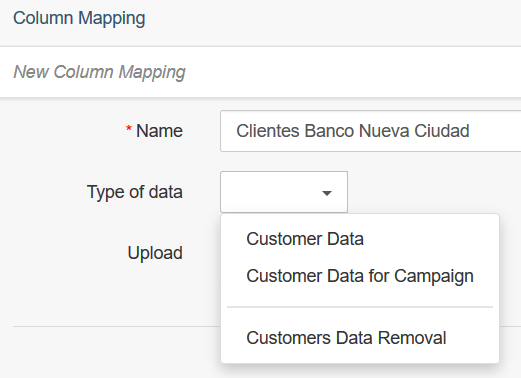
To create a new mapping, the first step is to enter a descriptive name. Next, choose the type of data (global customer data, customer data by campaign, or customer data deletion) from the Type of data drop-down list:
You can define the new mapping by uploading a file with the .csv extension containing the selected fields. To be valid, this file must contain at least one record (plus the corresponding headers).
Only the field names are taken into account when creating the mapping. The contents of the file are not uploaded at this point.
For Customer Data and Customer Data Removal, indicate one or more fields that are related or that will be added to the global data model utilized by the tool.
Customer Data for Campaign represents data that apply to a single campaign and do not make sense in others. For instance, a bank may be interested in surveying customers’ opinions after a home banking redesign. Customer data that is captured during this campaign is specific to it and will generally have no value for the rest.
The image below shows a customer data mapping after uploading a definition file:
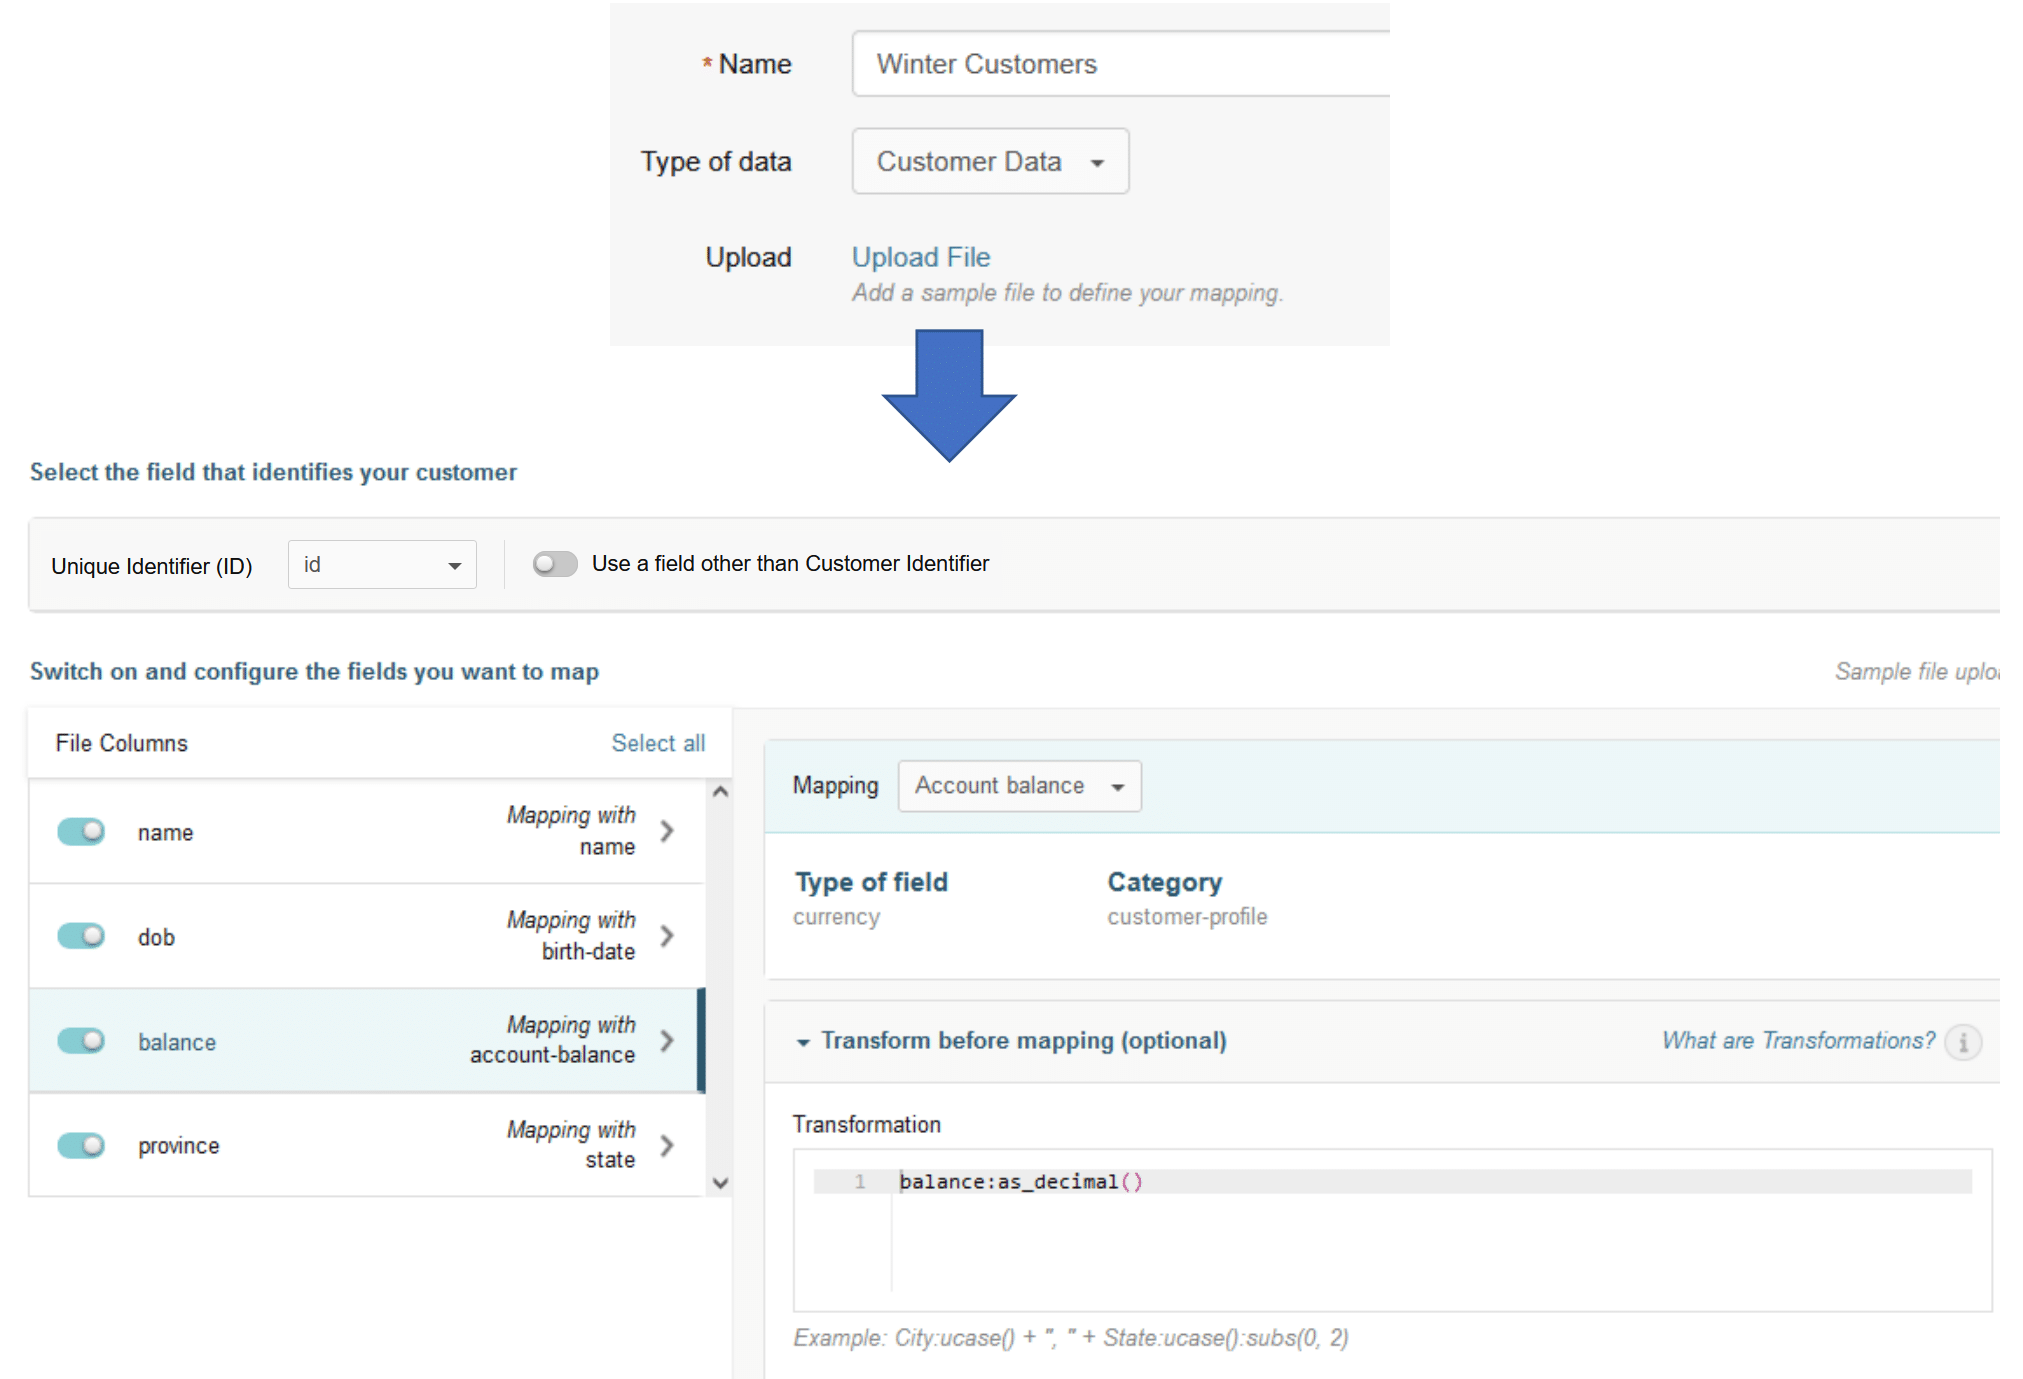
If the file does not contain a unique identifier, you can still create the mapping by matching a column from the file to a field in the database. For example, you may update customers by matching a field called EmailAddress in the source file to the column Email in the database.
| Field from file | Customer model |
|---|---|
| dob | birth-date |
| balance | account-balance |
| province | state |
Here, balance deserves special attention as it includes a transformation of a field before performing the mapping. In this particular scenario, the content will be converted to a decimal number. This is one of the data transformations that Prisma Campaigns allows to perform natively. Other possibilities include making arithmetic operations, adding time and time zone to a date, replacing characters, changing from lowercase to uppercase (or vice versa), and more. Thus, the user can set up transformations or calculated fields to make the input or output data fit their needs.
The column mappings attempt to match the fields in the file to those in the customer model. However, it is also possible to make adjustments to the selections and to create new fields if a similar one does not exist.
On the other hand, the following illustration shows a column mapping called DNI clientes Banco Nueva Ciudad that will permit to remove customer data. As you can see, Id_Cliente and DNI were selected to be part of the mapping, with the former acting as customer identifier.
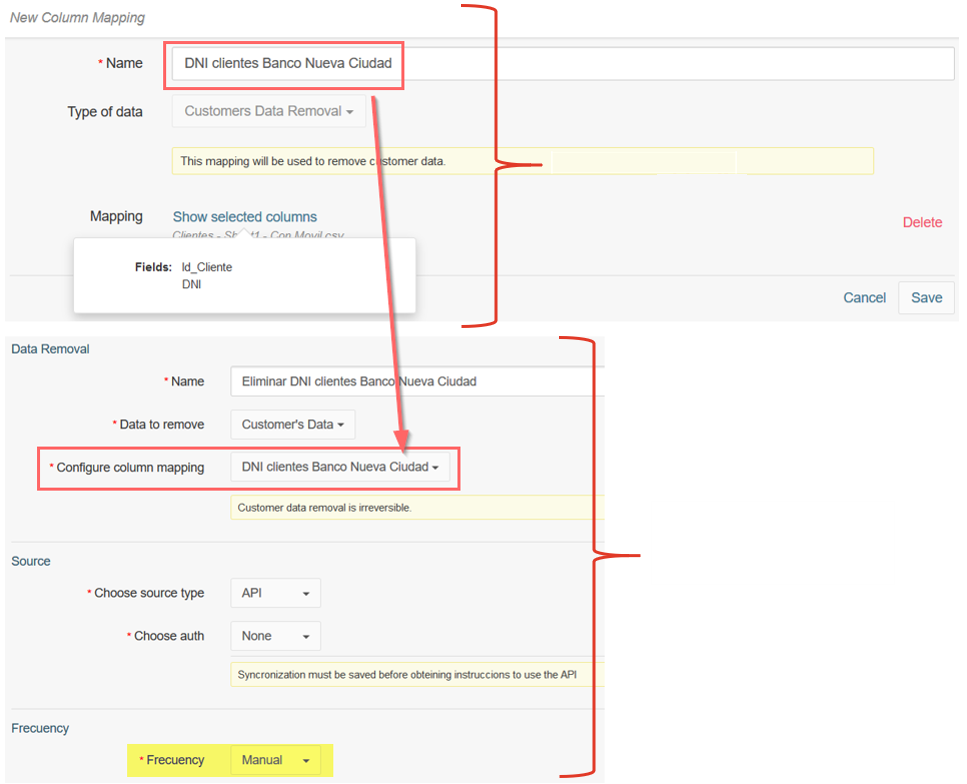
As observed above, this mapping can also be employed to define a new data sync. In this particular case, the field named DNI will be deleted via a manual API call.
Catalogs #
In simple terms, a catalog is a list of identifiers that may be represented as a hierarchical structure or not. Catalogs are often used to facilitate data entry by displaying a set of predefined values, thus restricting the allowed data types in a given field.
You can import catalogs to populate single or linked dropdown lists. The latter applies in the case of a hierarchical structure, where the first column represents the first level, the next is the second, and so on.
Example 1: Simple Catalog #
An example of a basic catalog is the list of the months of the year:
MONTH
January
February
March
April
May
June
July
August
September
October
November
December
A classic usage of this type of catalog consists of presenting the customer with a dropdown list to select his birth month.
Example 2: Hierarchical Catalog #
On the other hand, you may want to have the customer indicate his country of residence during the campaign funnel. Based on that selection, he should be able to select his province or region of residence in that country, and finally, the city where he lives in that state. In this instance, you could use a catalog such as the following:
COUNTRY;PROVINCE;CITY
Uruguay;Montevideo;Puerto
Uruguay;Montevideo;Ciudad Vieja
Uruguay;Montevideo;Centro
Argentina;Buenos Aires;25 De Mayo
Argentina;Buenos Aires;3 De Febrero
Argentina;Buenos Aires;A. Alsina
The semicolon (;) acts as the field delimiter in a hierarchical catalog.
In this particular example, the customer can only choose Uruguay or Argentina in the country dropdown list. Depending on this choice, he can then select Montevideo or Buenos Aires, respectively, and finally any of the available cities in those provinces. This example illustrates the fact that each list is the parent node of the next one to its right. As we can see here, the lists of countries, states or provinces and cities are a common use case for a hierarchical catalog.
Importing Catalogs #
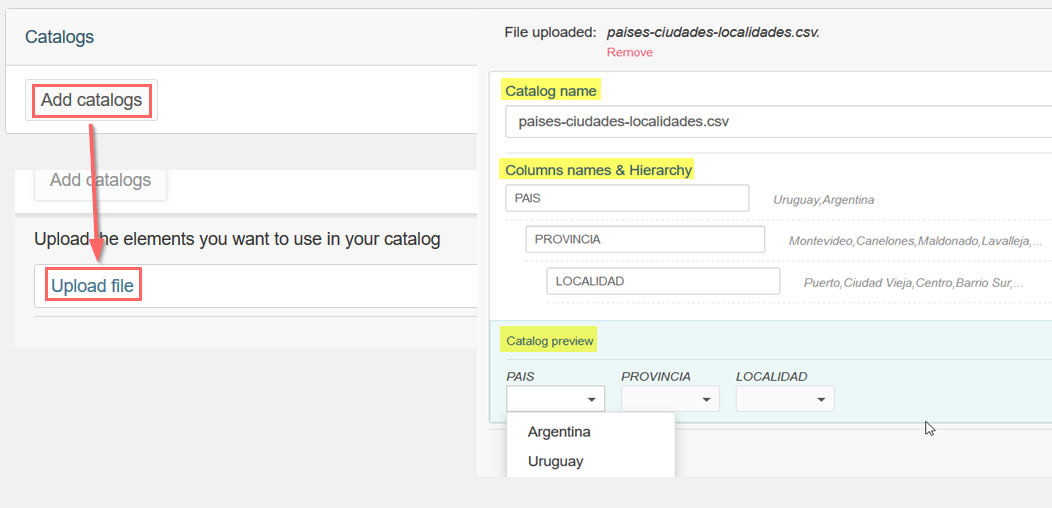
Before you can import a catalog, you need to save it as a .csv file. Next, click on Add catalogs and then Upload file. If the operation succeeds, you will see the name of the catalog (which will match the filename), the hierarchy and the field names (as they appear from left to right in the file), and a preview with a dropdown list by field. The last step consists of clicking Save if the preview matches our expectations. Otherwise, we can cancel the changes through the Cancel button.
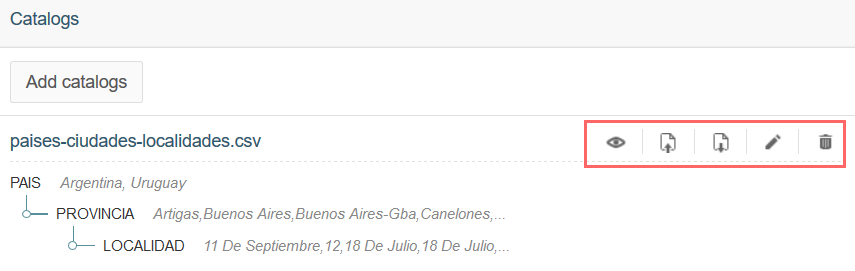
To manipulate the catalog (remove fields or the entire catalog, export it, or update it to name a few examples), we can do so through the icons shown in the image below:
One of the main advantages of populating dropdown lists through catalogs resides in the possibility of reducing human error during data entry. At the same time, it allows you to implement a standard in the allowed content for each field. For example, you can prevent customers from typing montevideo or MONTEVIDEO (or another variation) by providing them with Montevideo in the dropdown list, which in turn will make reading and processing data much easier.
Condition Templates #
Prisma Campaigns allows the implementation of complex conditions (on top of the default ones) through the use of condition templates. Through this tool, you can customize the operation of the platform to match your needs without understanding how a given condition resolves at the customer data level. For example, using the client’s birth date or the date when the commercial relationship began, a template can be created to detect a birthday or anniversary. Most often these templates are put in place when Prisma Campaigns is first set up, although it is possible to create others afterward.
Condition templates are added in one of the following categories: customer profile, contextual data, demographics, and interaction history. Once you choose one of these options and save the changes, the template will be ready for use as explained later.
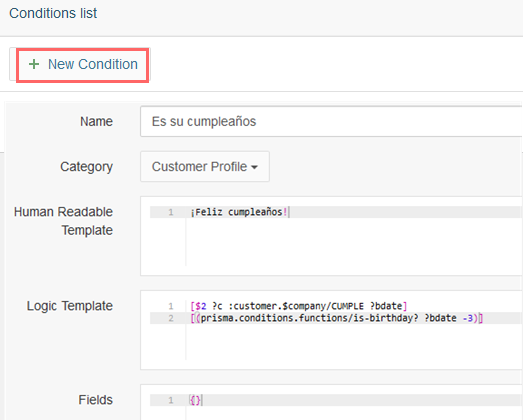
For instance, to create a new template called Es su cumpleaños (It’s your birthday), click New Condition and then fill in the fields as observed in the following image. However, it is important to clarify that the complexity of this operation requires the involvement of the Prisma Campaigns support team to create new templates.
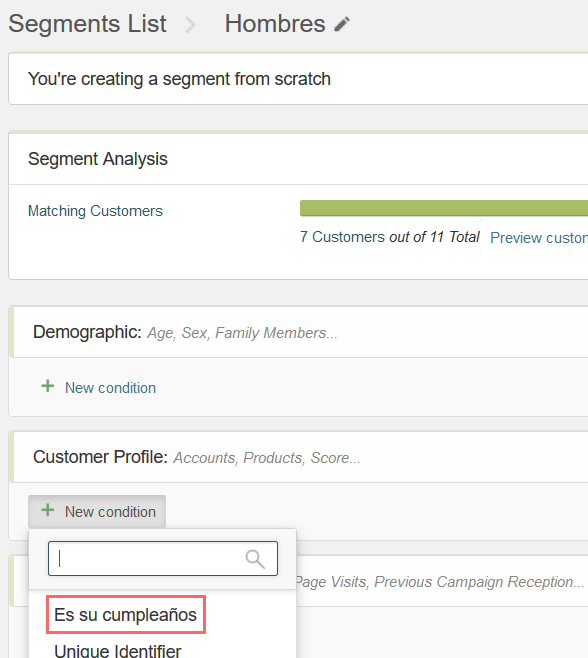
Once the condition template is created, it can be used to define segments. The image below shows that Es su cumpleaños is now available in the customer profile filter. This is precisely the category where the template had been saved earlier.
It is worth noting that you can employ this particular condition template in other places where you need customization based on the customer profile. The same applies to all condition templates based on the corresponding category.